When working as a 1 Person Crew we have plenty of things to worry about. Here are some underused tricks I use to save lots of time and minimize potentially fatal mistakes.
First, let’s face it. I’m a geek. I am one of the very few people who not only READ instruction manuals, but actually ENJOY doing so. Done. My public confession is out.
I have used way too many cameras (just ask my accountant, my wife or simply check the screenshot below). My current favorites for documentary work and short films are the Sony FS7 and Canon C200 (respectively)

I also have been using the Panasonic Lumix line since the GH3, not only for their small form factor, portability, and image quality, but also because of their incredible versatility. You could adapt a Panasonic Lumix GH4 or GH5 to virtually any existing workflow, be it AVCHD, MP4, MOV, HD, 4K or Cinema 4K. That’s incredible!
Recording Options on the Panasonic GH5.
Today’s article is about choosing the right settings for a specific project. I usually bring at least two cameras on every assignment. I like to save identical settings on them, so when I turn the cameras on, they match exactly, every time. This saves a tremendous amount of time and minimizes potential mistakes.
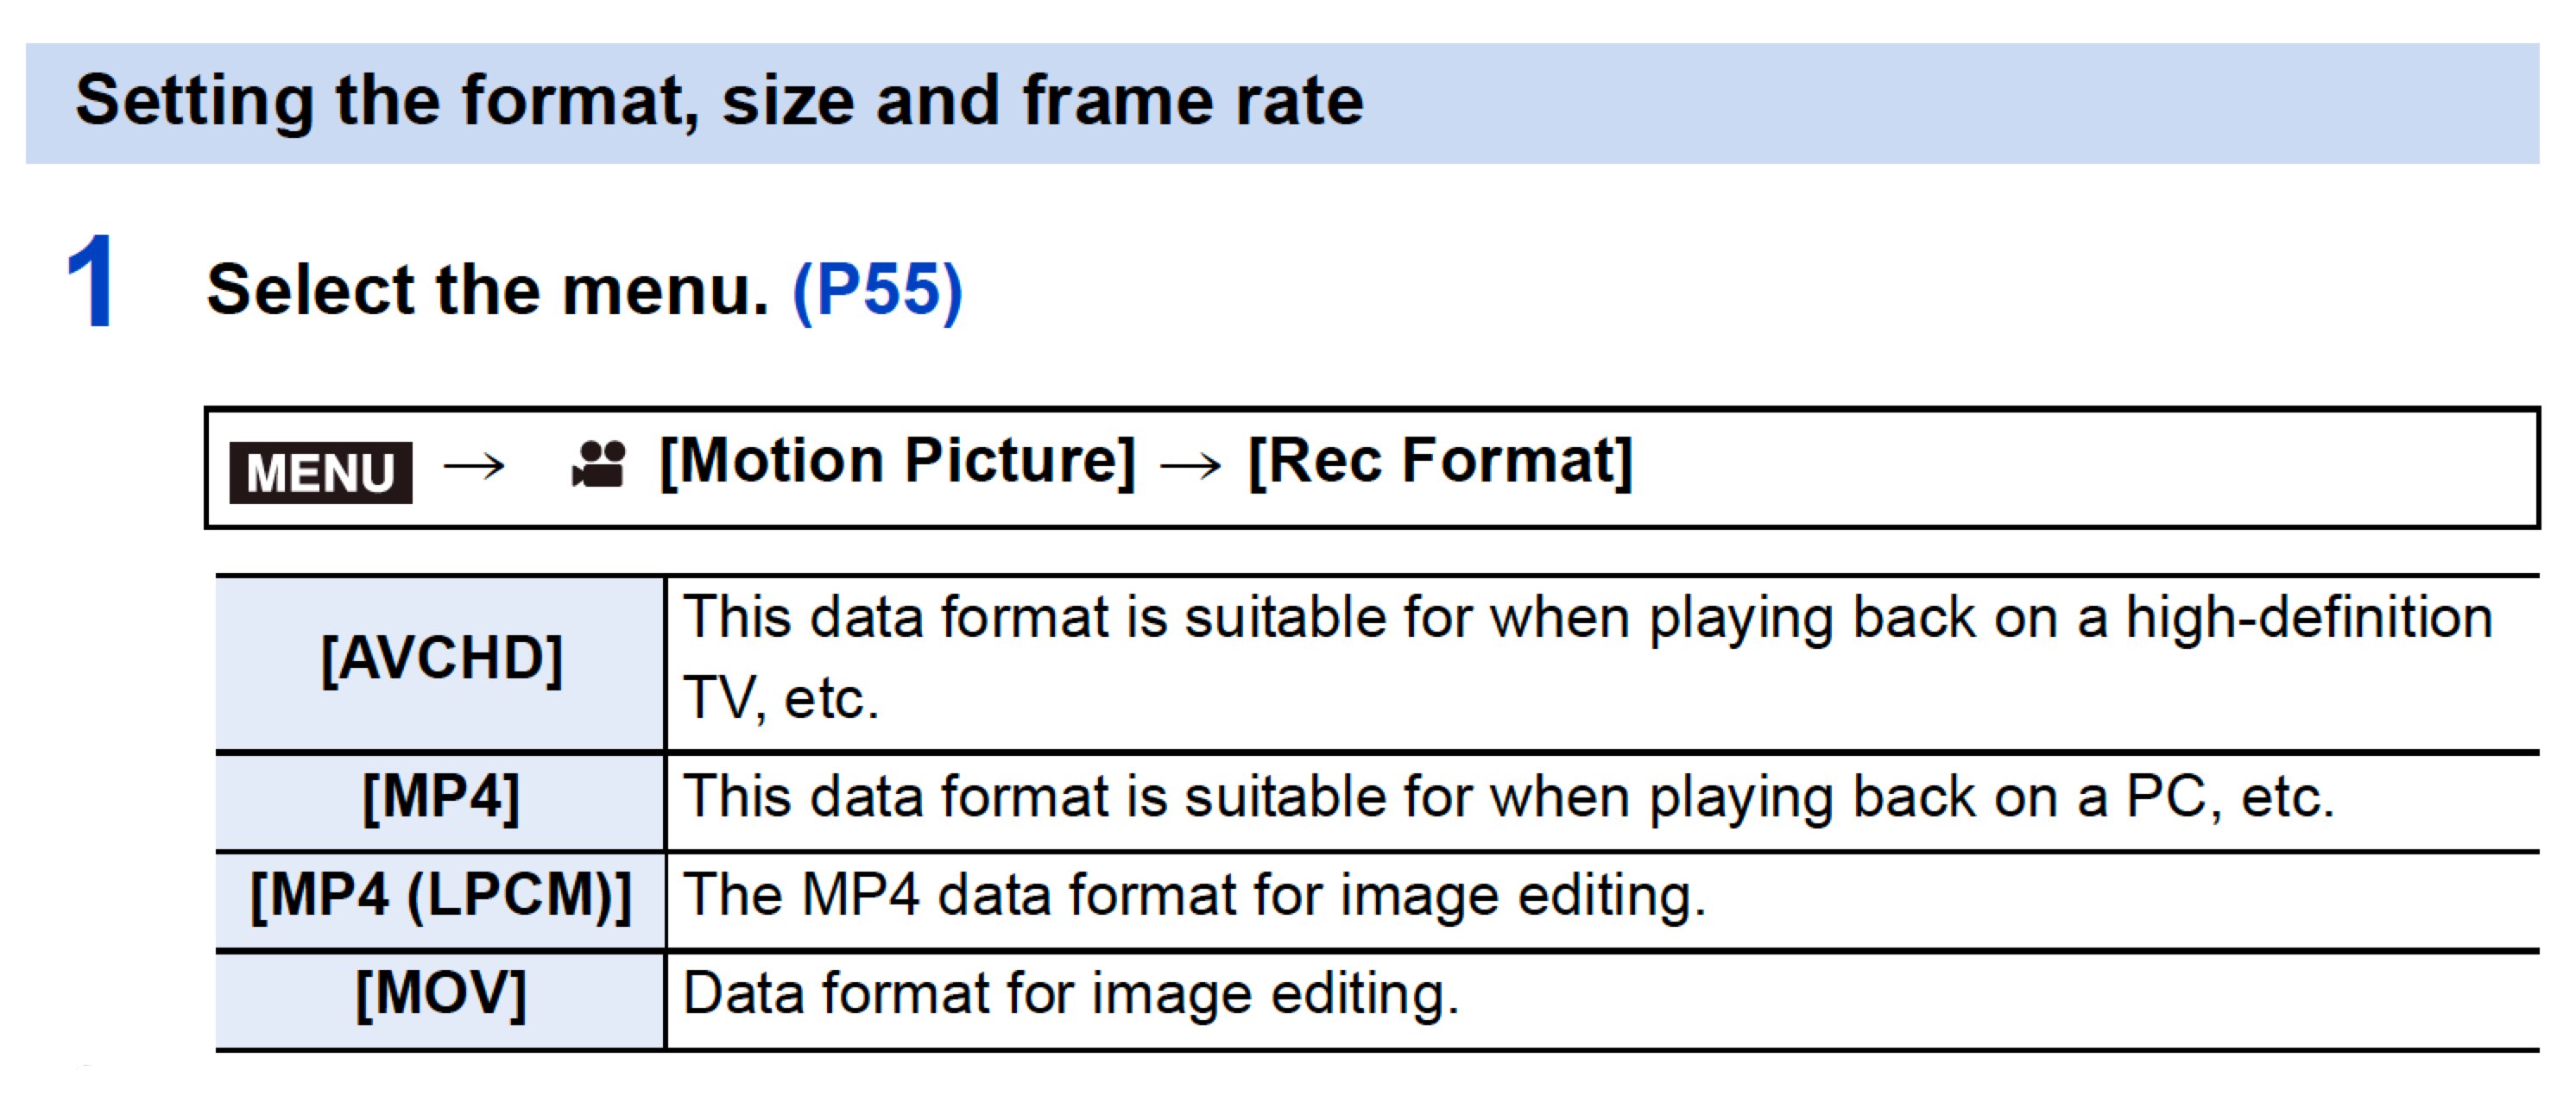
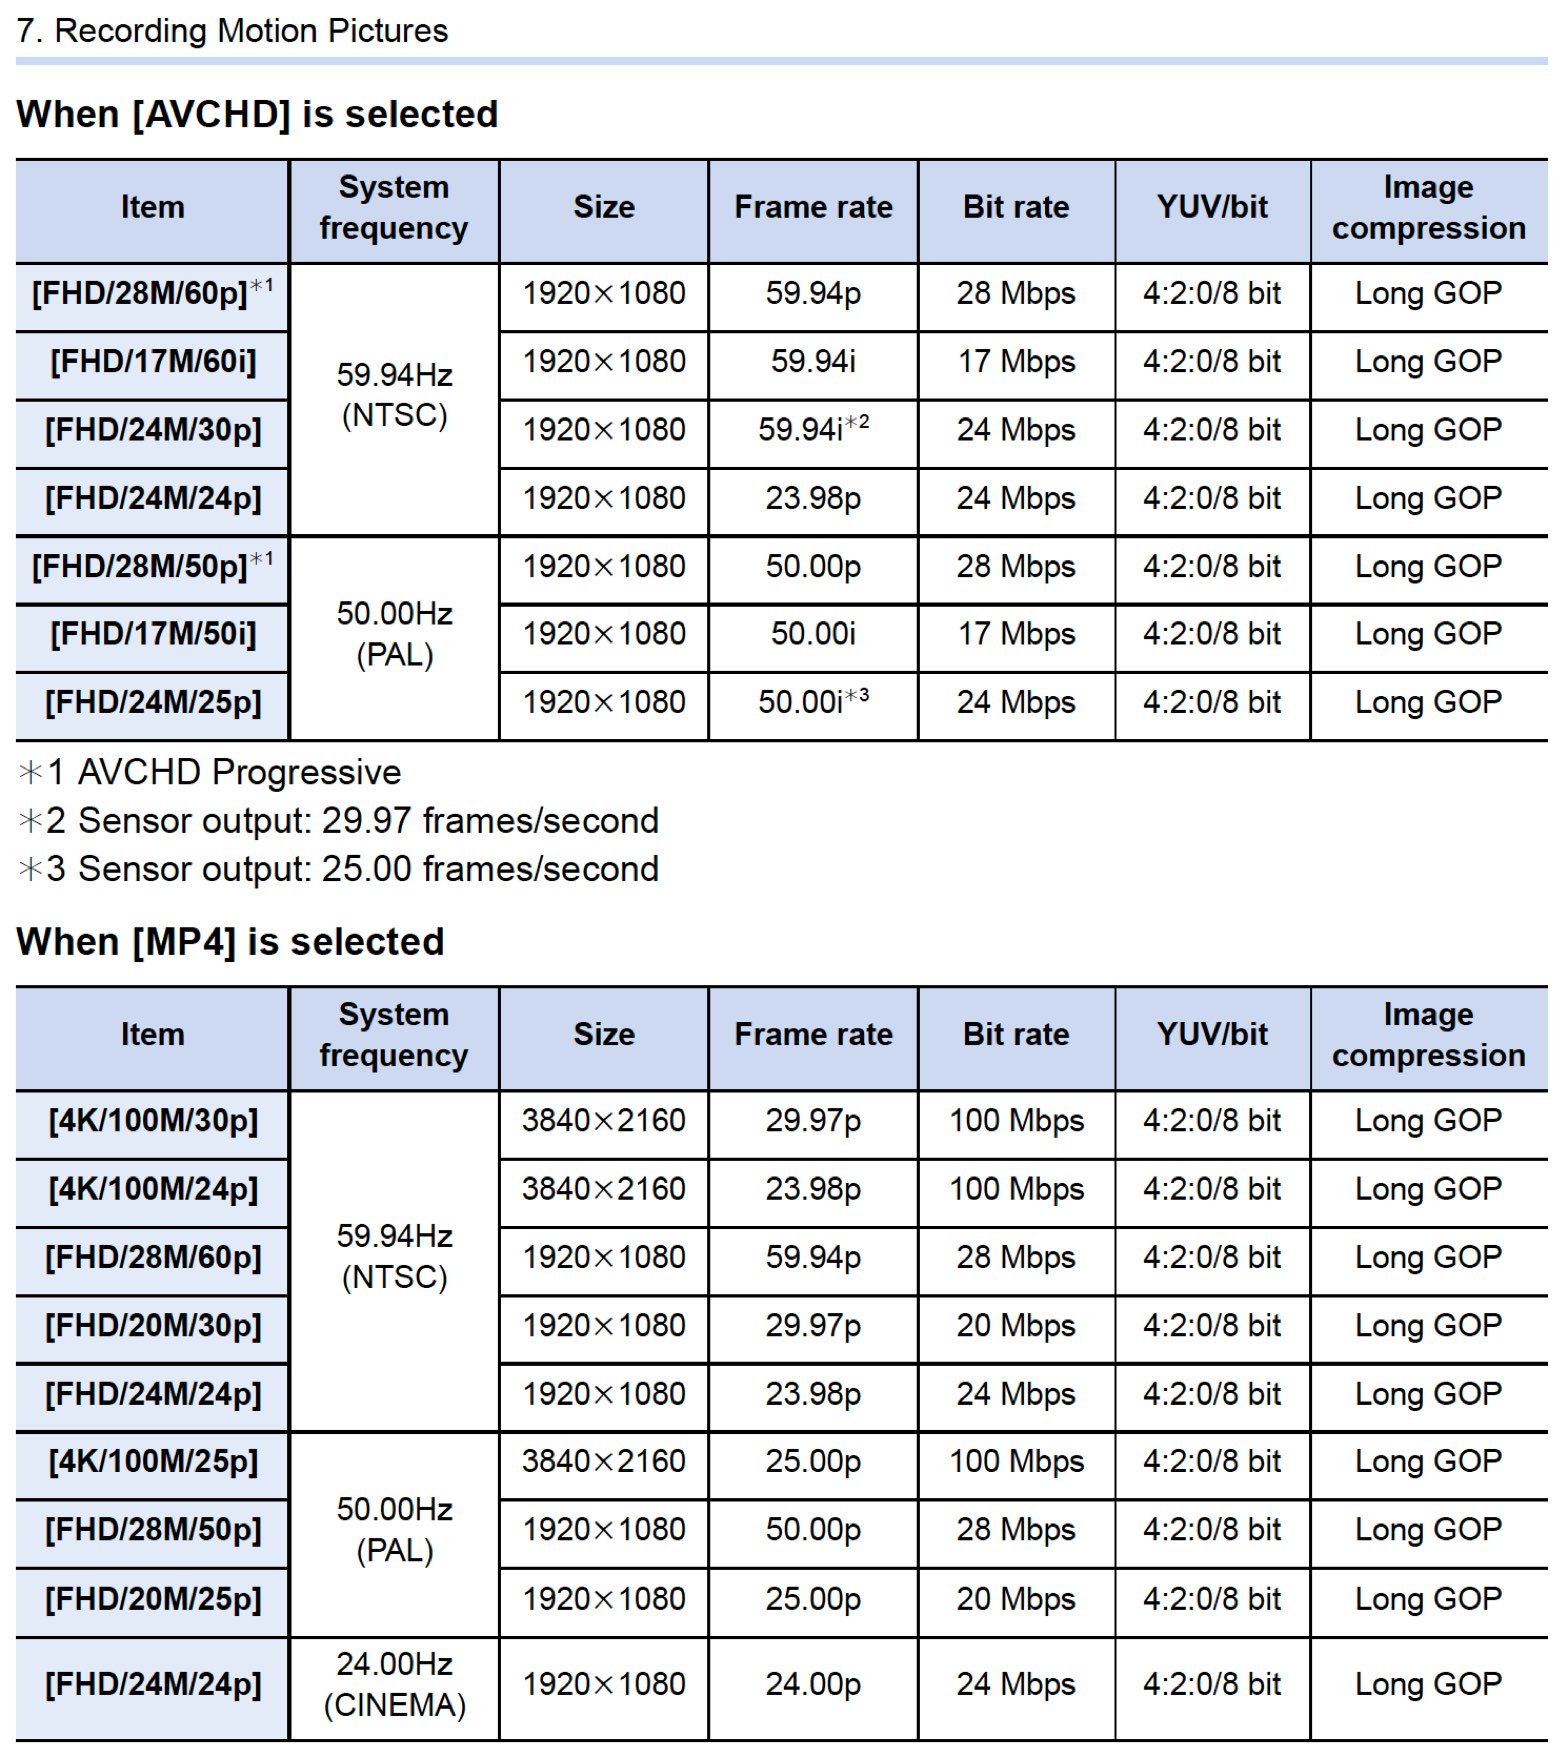
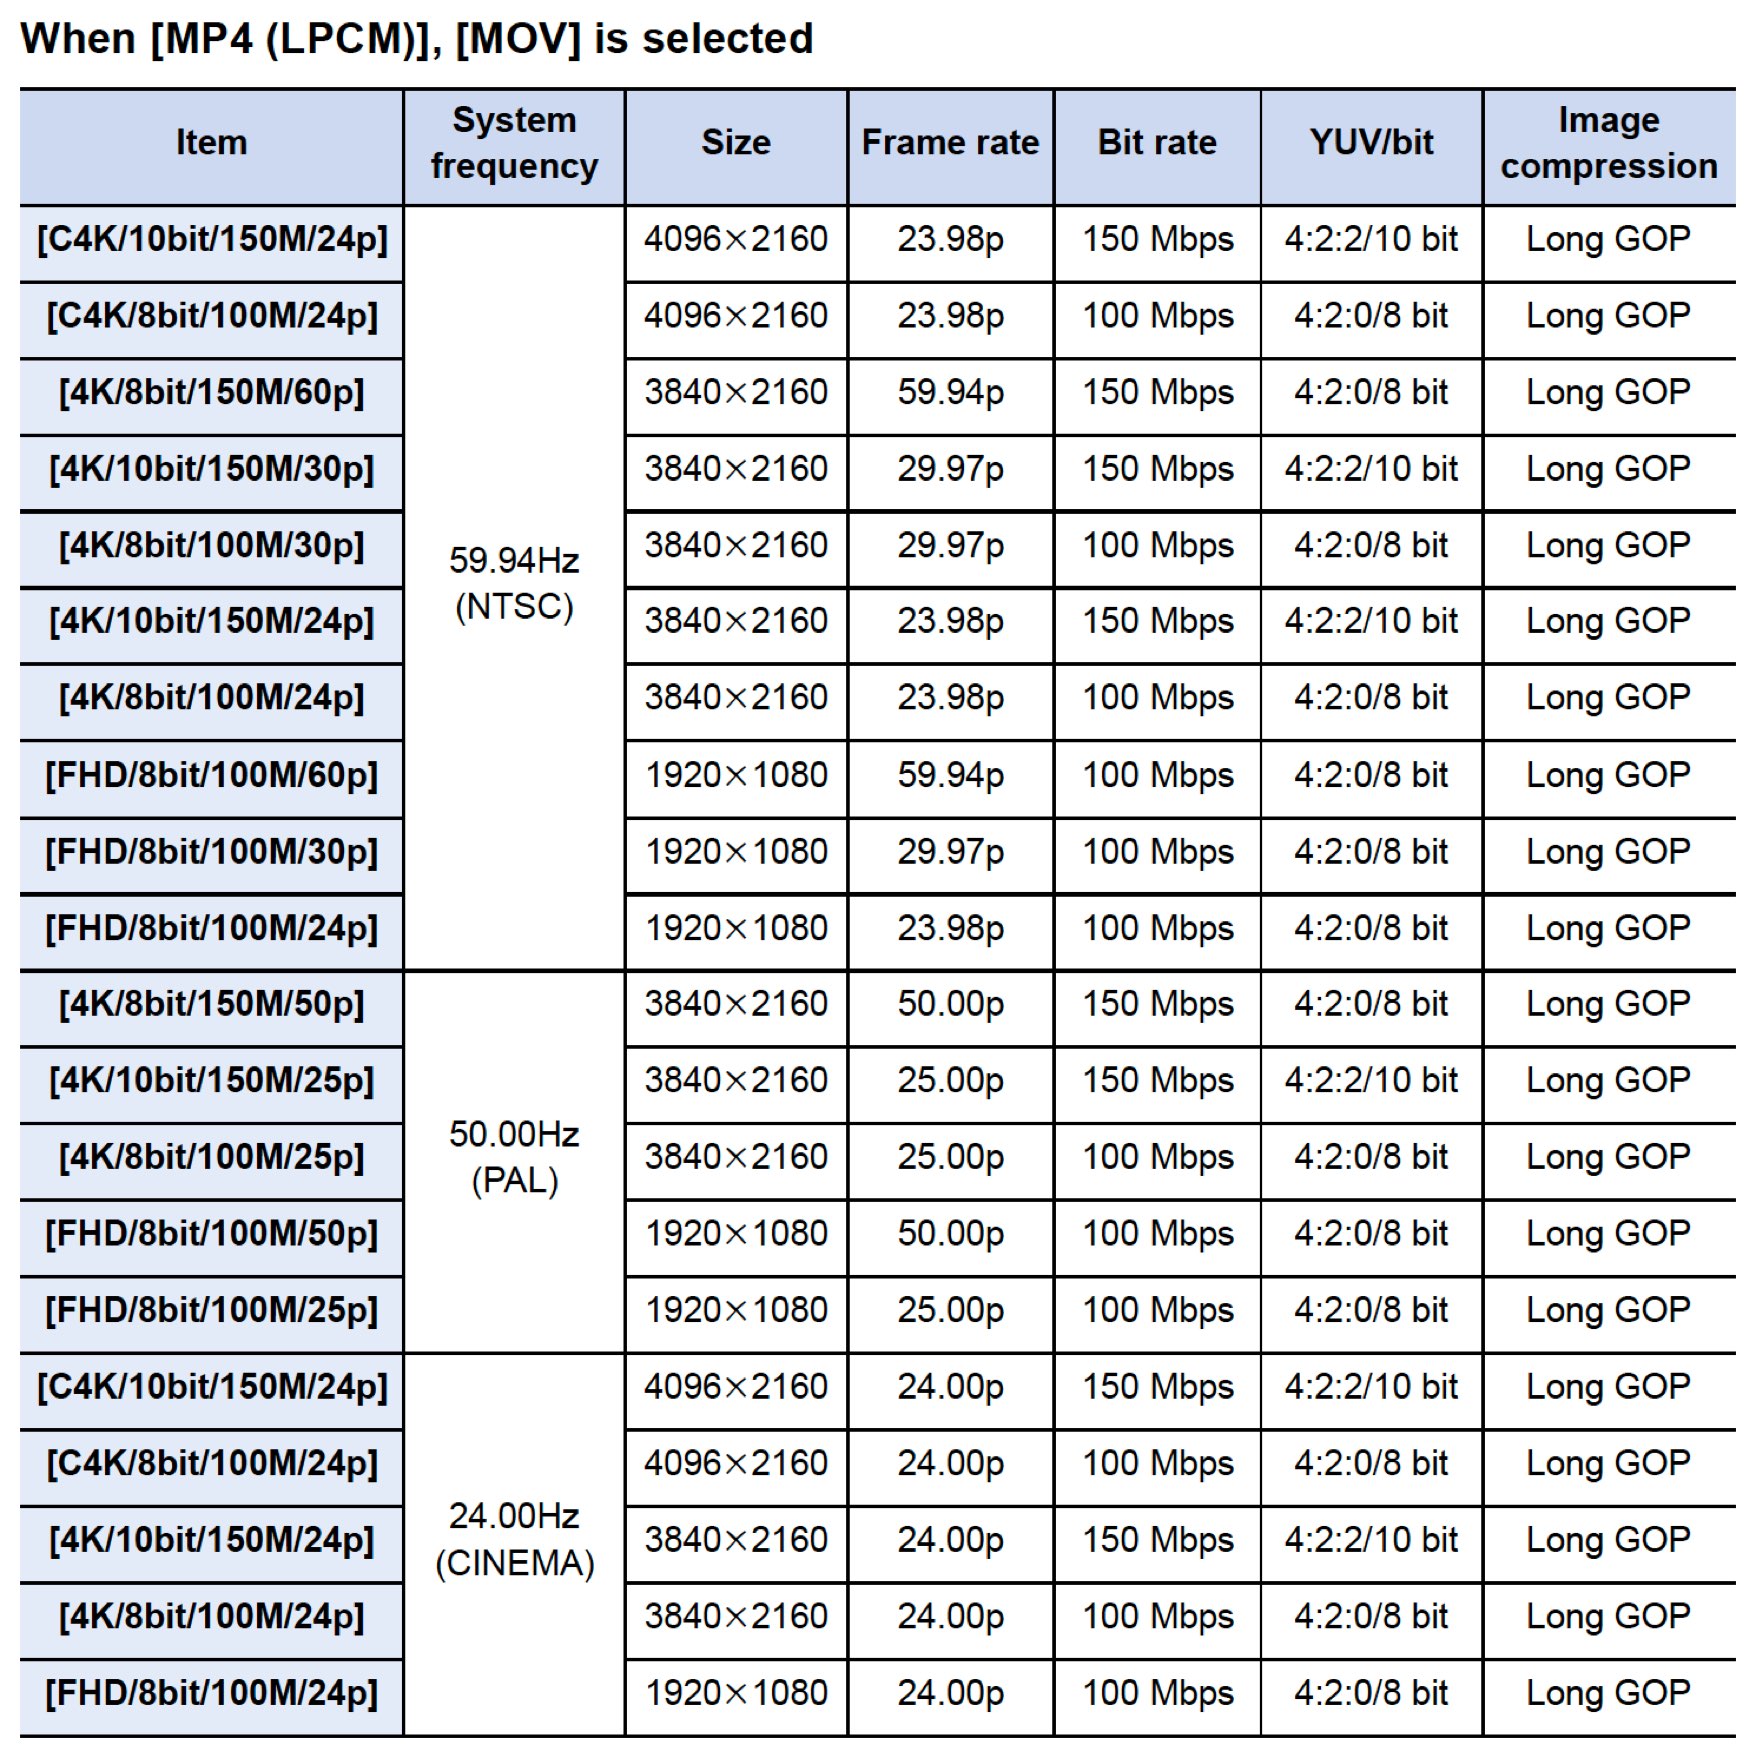
Here are more screenshots from the Panasonic GH5 Manual, which seems perfectly designed to scare people away. The charts do not reflect the most recent firmware version (v2.3) for the Panasonic GH5.
My Ultra Geeky Approach
I did something only a super geek would do. Made a pot of coffee, opened Excel, and with my camera on hand re-organized Panasonic’s charts in a friendlier and more useful way.
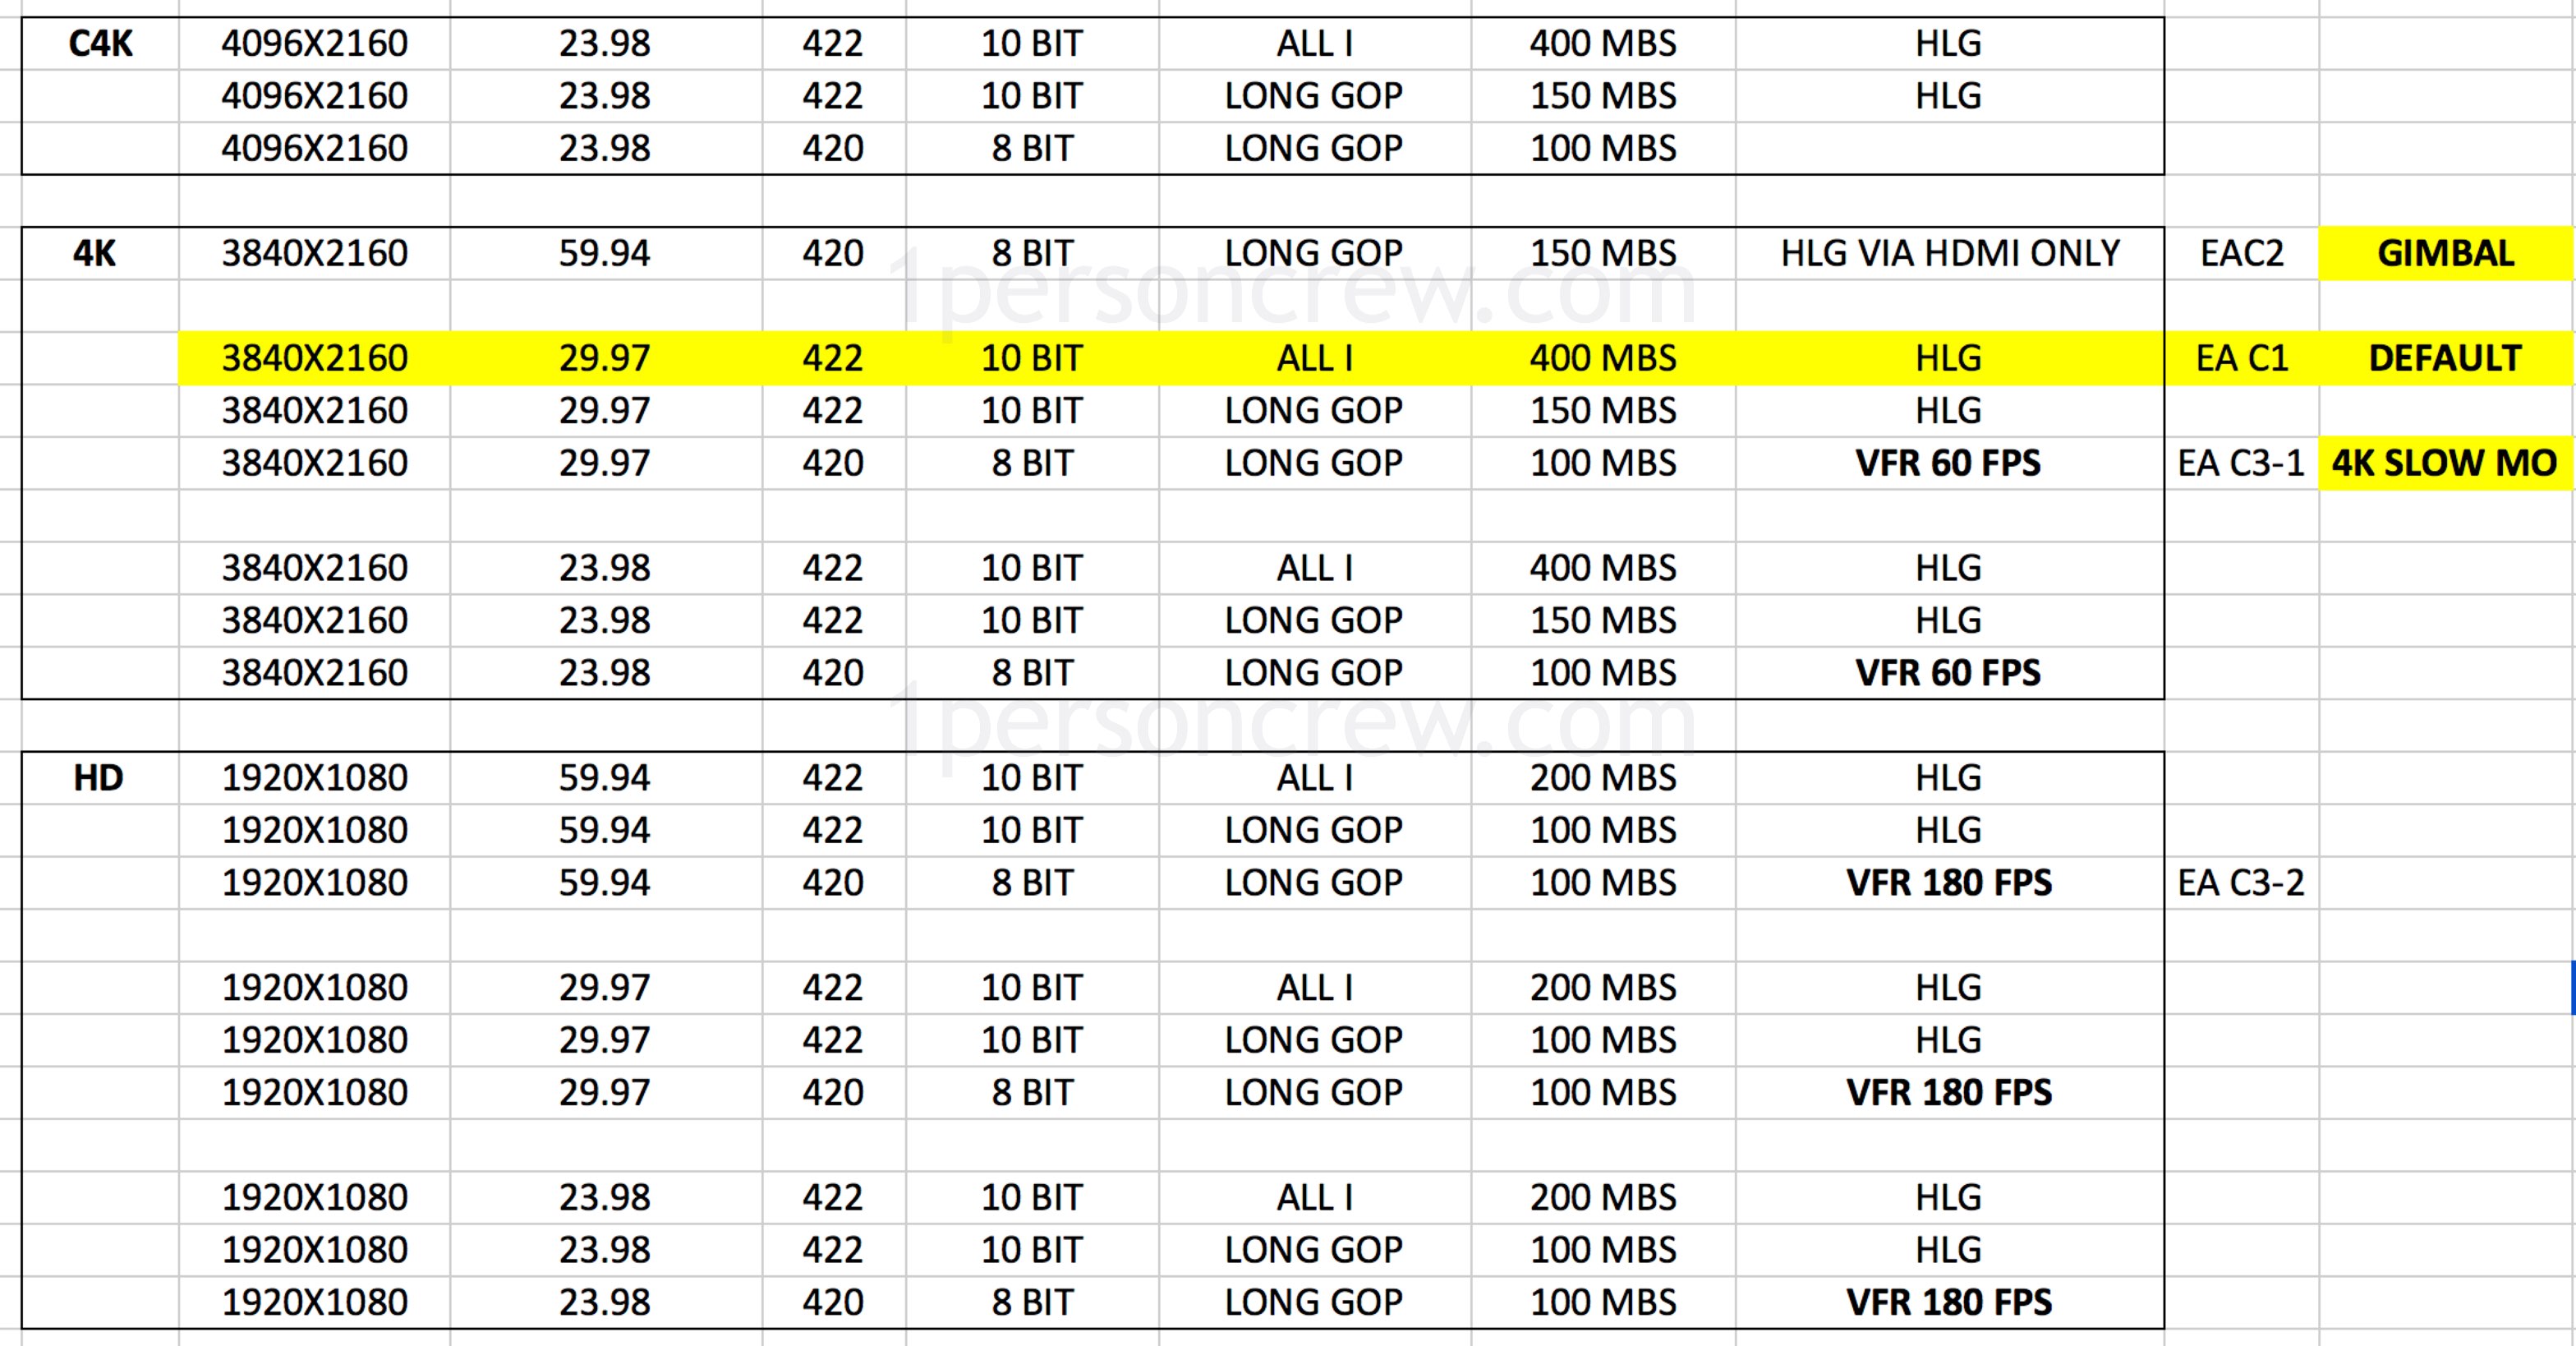
As you can see on the far-right column, I also added EAC1, EAC2 and EAC3. Those are my Custom Menus saved to each camera so the starting point is always the same.
Note: I prefer to shoot UHD (3840X2160) over Cinema 4K (4096X2160) simply because it is easier to incorporate into HD (1920×1080) projects.
3840/2 = 1920 and 1080/2 = 1080
My Default Modes
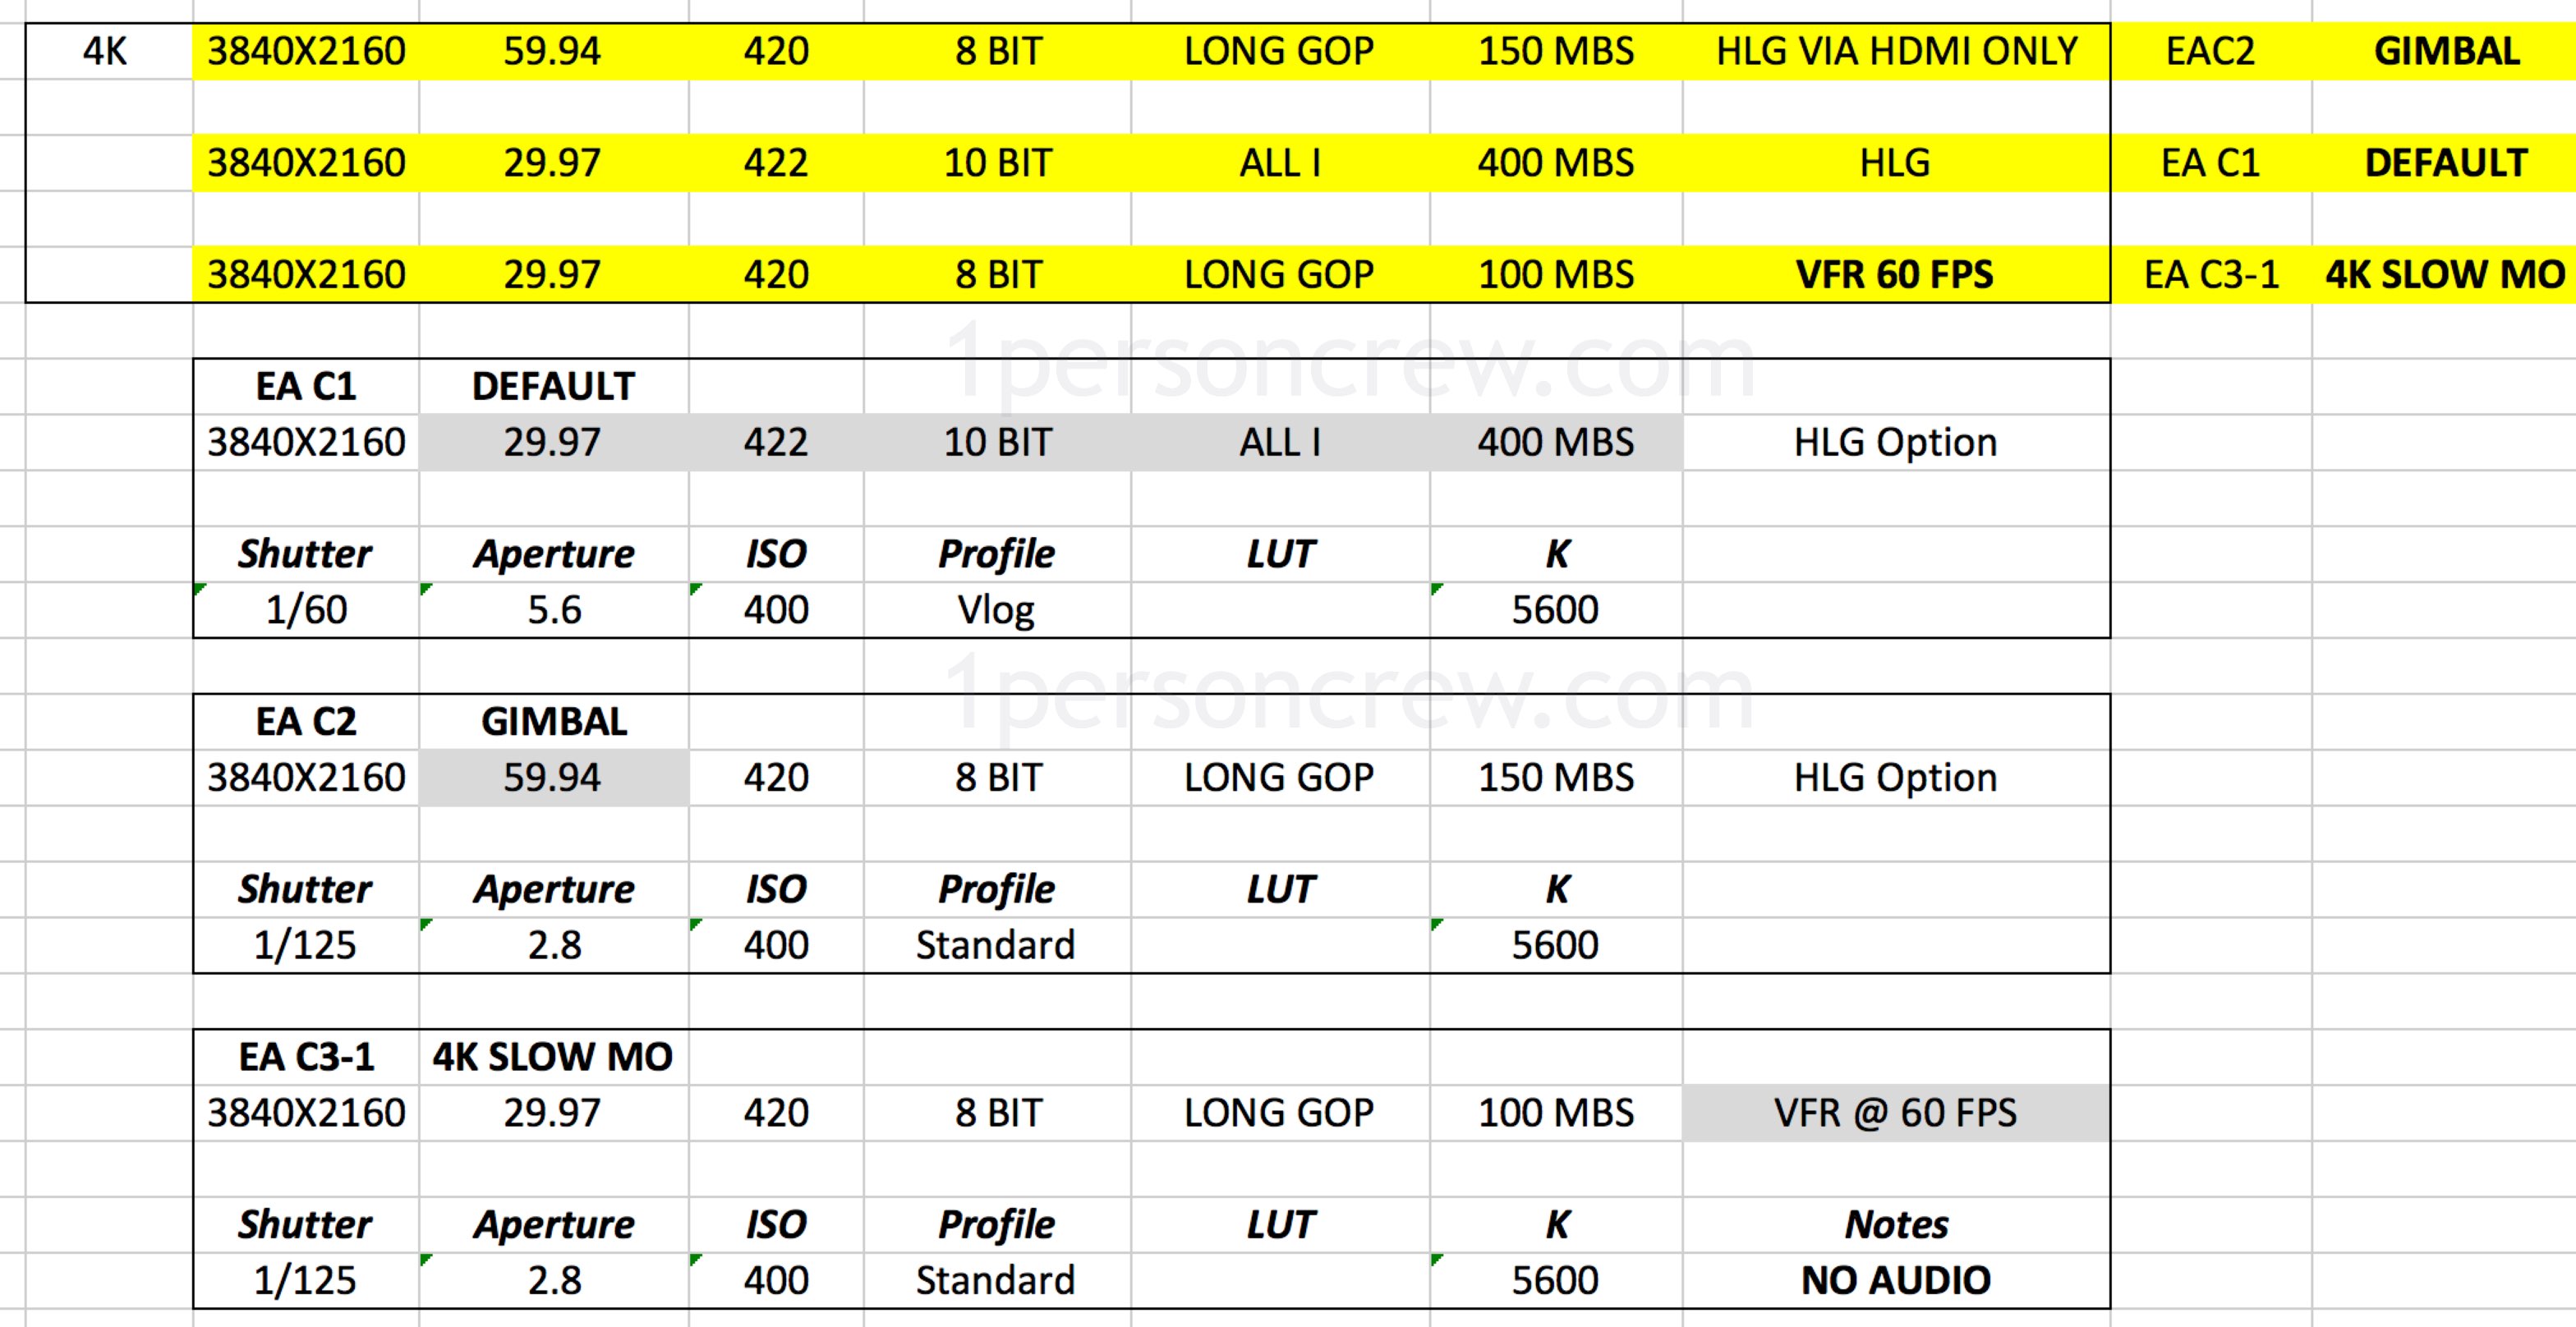
Since most of my work ends up on YouTube or Vimeo 30 frames per second is a good starting point.
Doubling the frame rate (30×2) gives us a good starting point for your shutter speed, which is set at 1/60th of a second.
Ideally we want to extract as much data from the camera’s sensor as possible, so I choose 422 10-Bit.
VLog (similar to S-Log on Sony, C-Log on Canon, and very recently N-Log for Nikon) is set my default camera profile, so I have more room to enhance the story through color. Keep in mind that I only go this route if I know I’ll have enough time for post-production, otherwise I’d chose the “default” camera profile and call it a day.
VLog has a minimum ISO of 400, so that’s that. An aperture of f5.6 is a nice starting point, as well as 5600 Kelvin for my White Balance.
EC2 is my Camera Setting for shooting on Gimbals and I use EC3 when I want/need to shoot at 60 frames per second and play with the footage in post. Here’s another post on Camera Movement.
The cool thing about this approach is that I can save my custom settings and import them into another Panasonic GH5 (running the same firmware version), without having to select every single option again.
Here’s how to perform that magic trick:

Working as a 1 Person Crew we constantly worry about audio, framing, exposure, directing and when to replace the batteries. Anything we can do to save time and avoid potentially fatal mistakes is key. Saving Custom Camera profiles is in my opinion an underused but awesome trick. Enjoy!