Demystifying Recording Options on the Panasonic GH5.


When working as a 1 Person Crew we have plenty of things to worry about. Here are some underused tricks I use to save lots of time and minimize potentially fatal mistakes.

First, let’s face it. I’m a geek. I am one of the very few people who not only READ instruction manuals, but actually ENJOY doing so. Done. My public confession is out.

I have used way too many cameras (just ask my accountant, my wife or simply check the screenshot below). My current favorites for documentary work and short films are the Sony FS7 and Canon C200 (respectively) 

I also have been using the Panasonic Lumix line since the GH3, not only for their small form factor, portability, and image quality, but also because of their incredible versatility. You could adapt a Panasonic Lumix GH4 or GH5 to virtually any existing workflow, be it AVCHD, MP4, MOV, HD, 4K or Cinema 4K. That’s incredible!
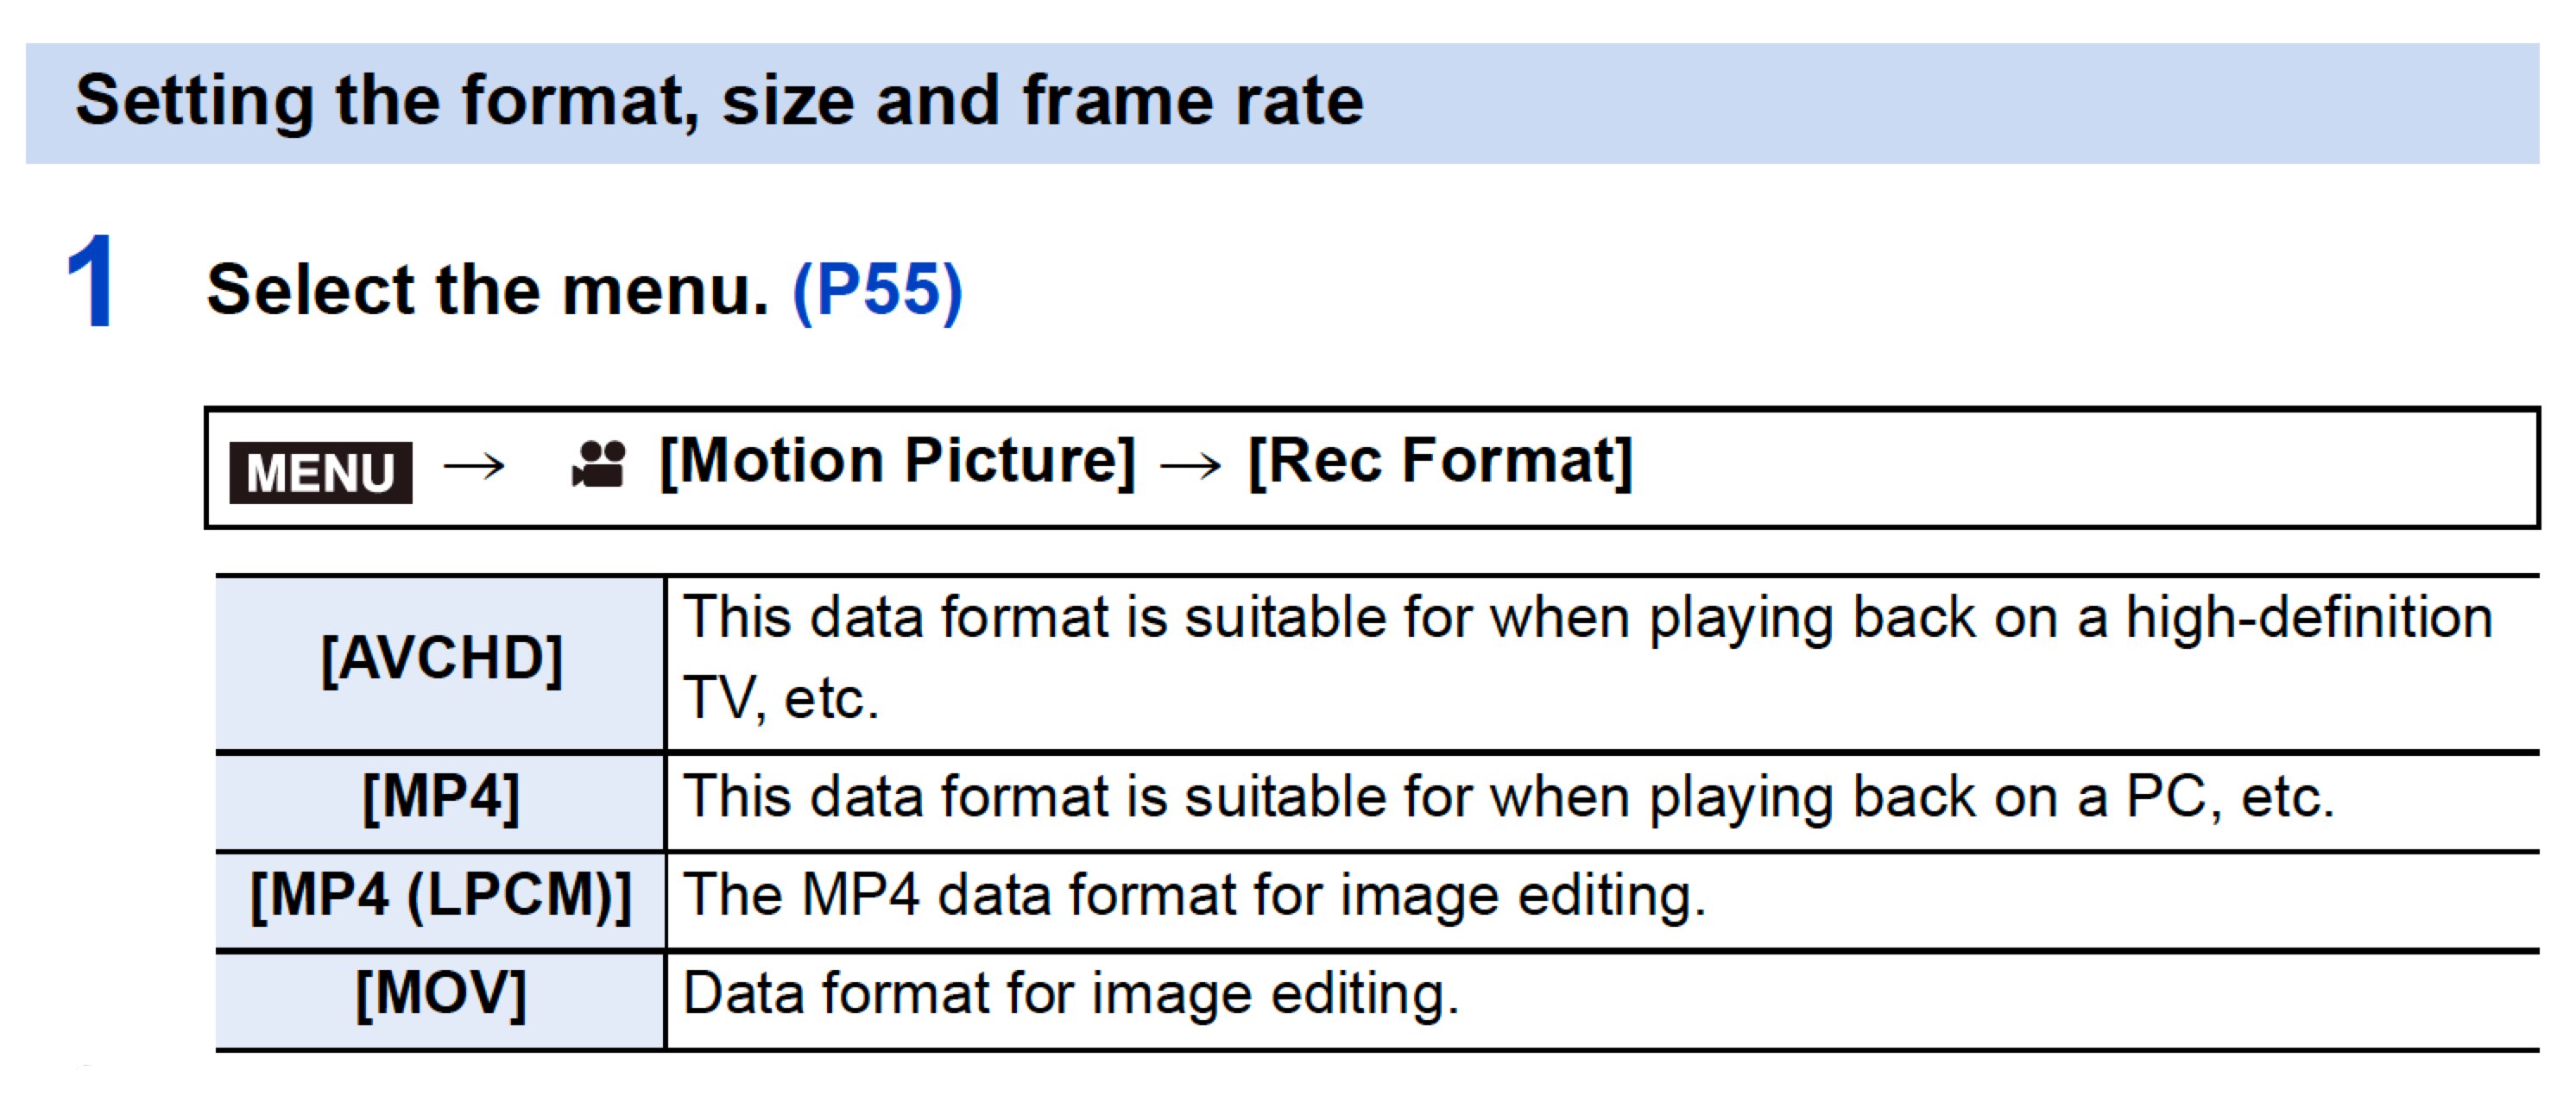
Screenshot from the Panasonic GH5 Manual.

Recording Options on the Panasonic GH5.

Today’s article is about choosing the right settings for a specific project. I usually bring at least two cameras on every assignment. I like to save identical settings on them, so when I turn the cameras on, they match exactly, every time. This saves a tremendous amount of time and minimizes potential mistakes.

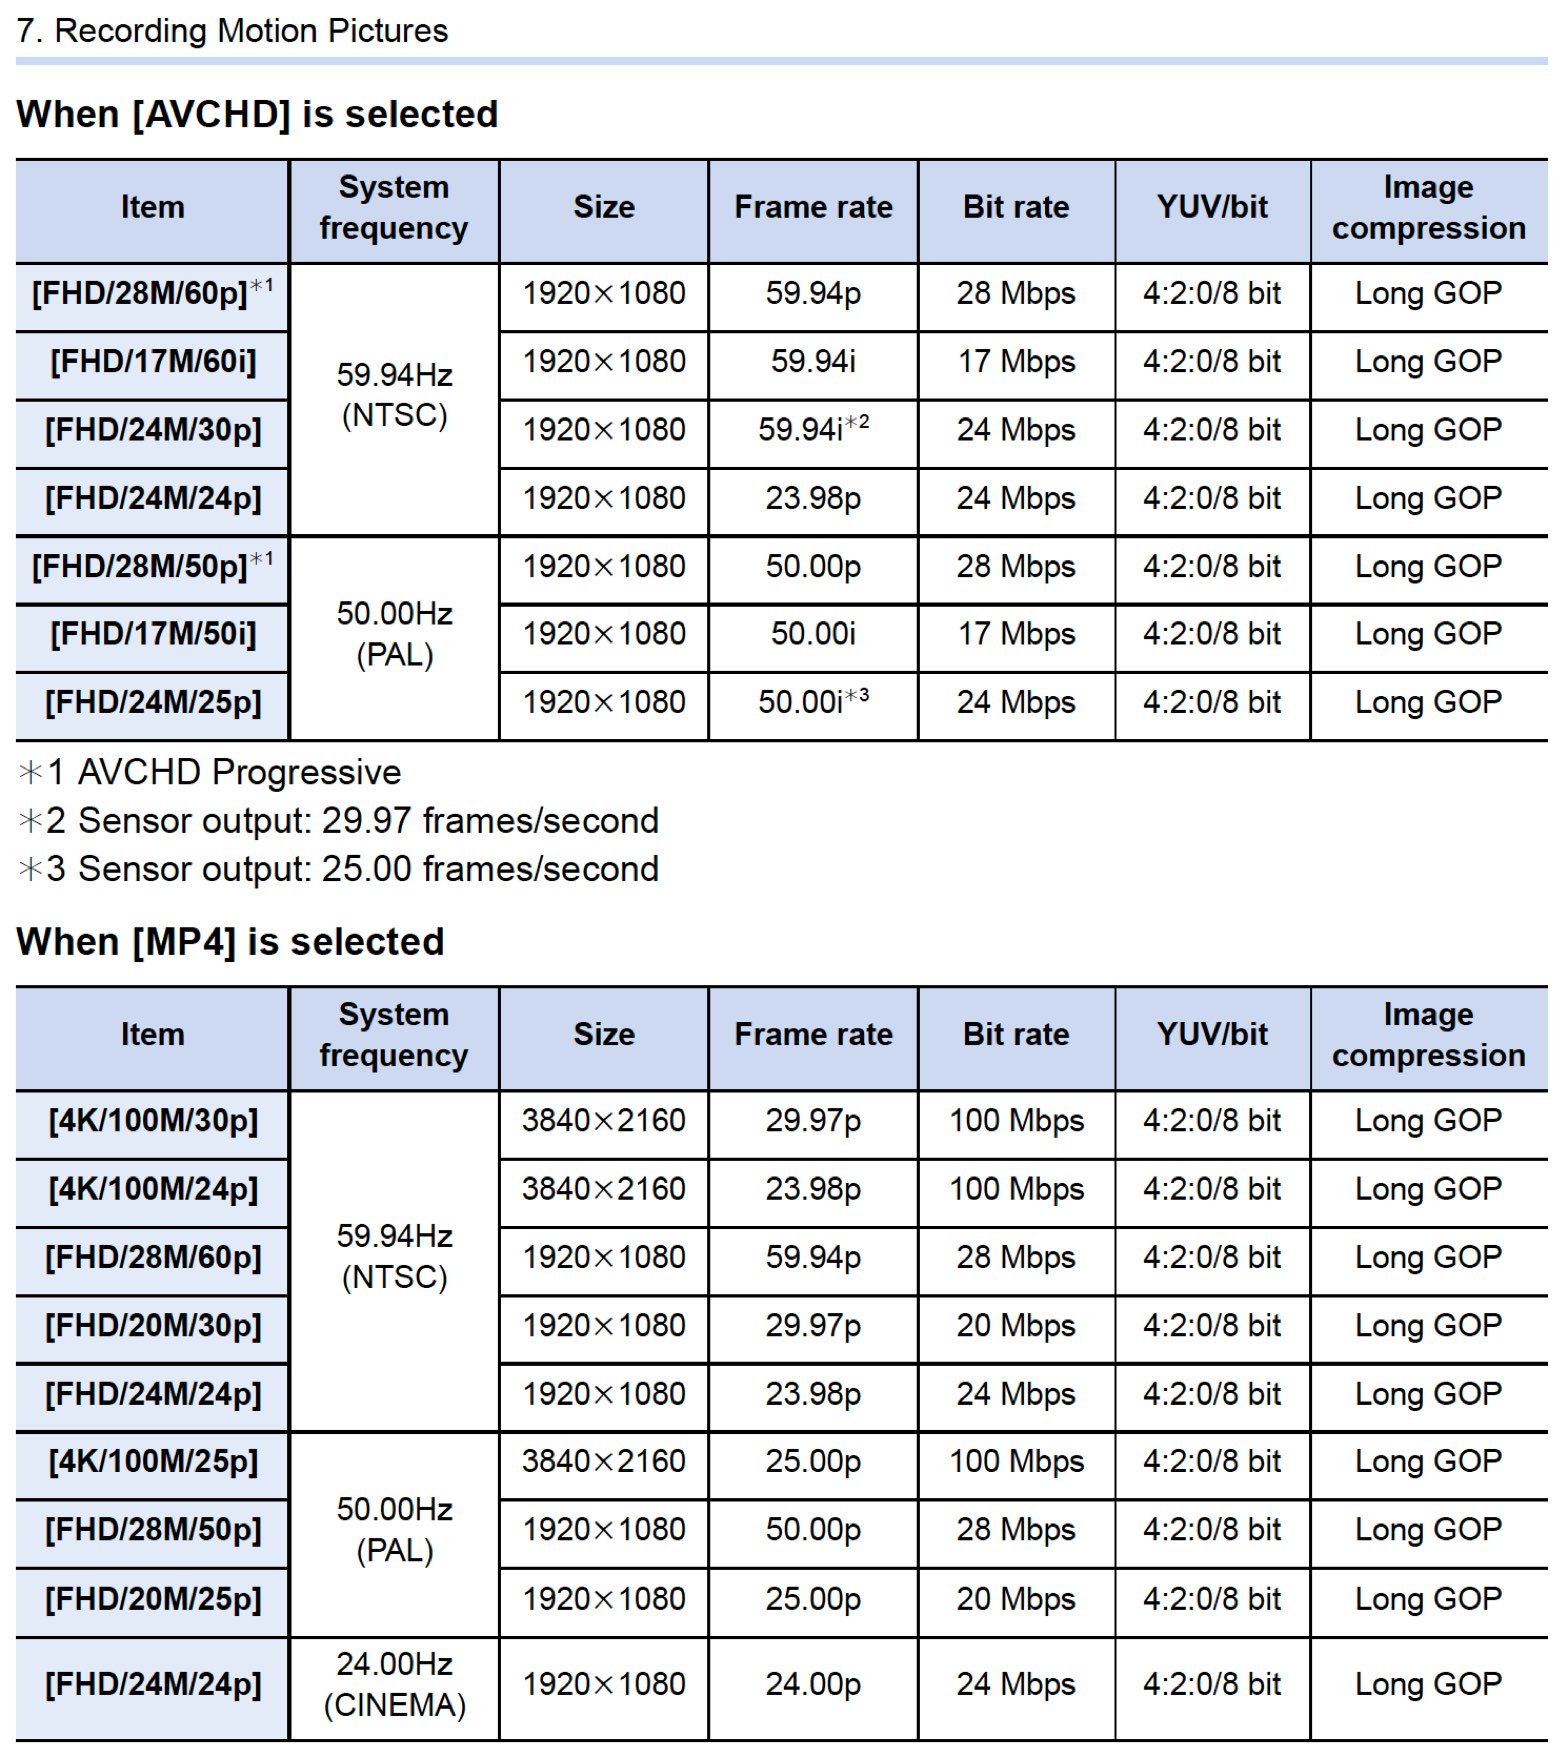
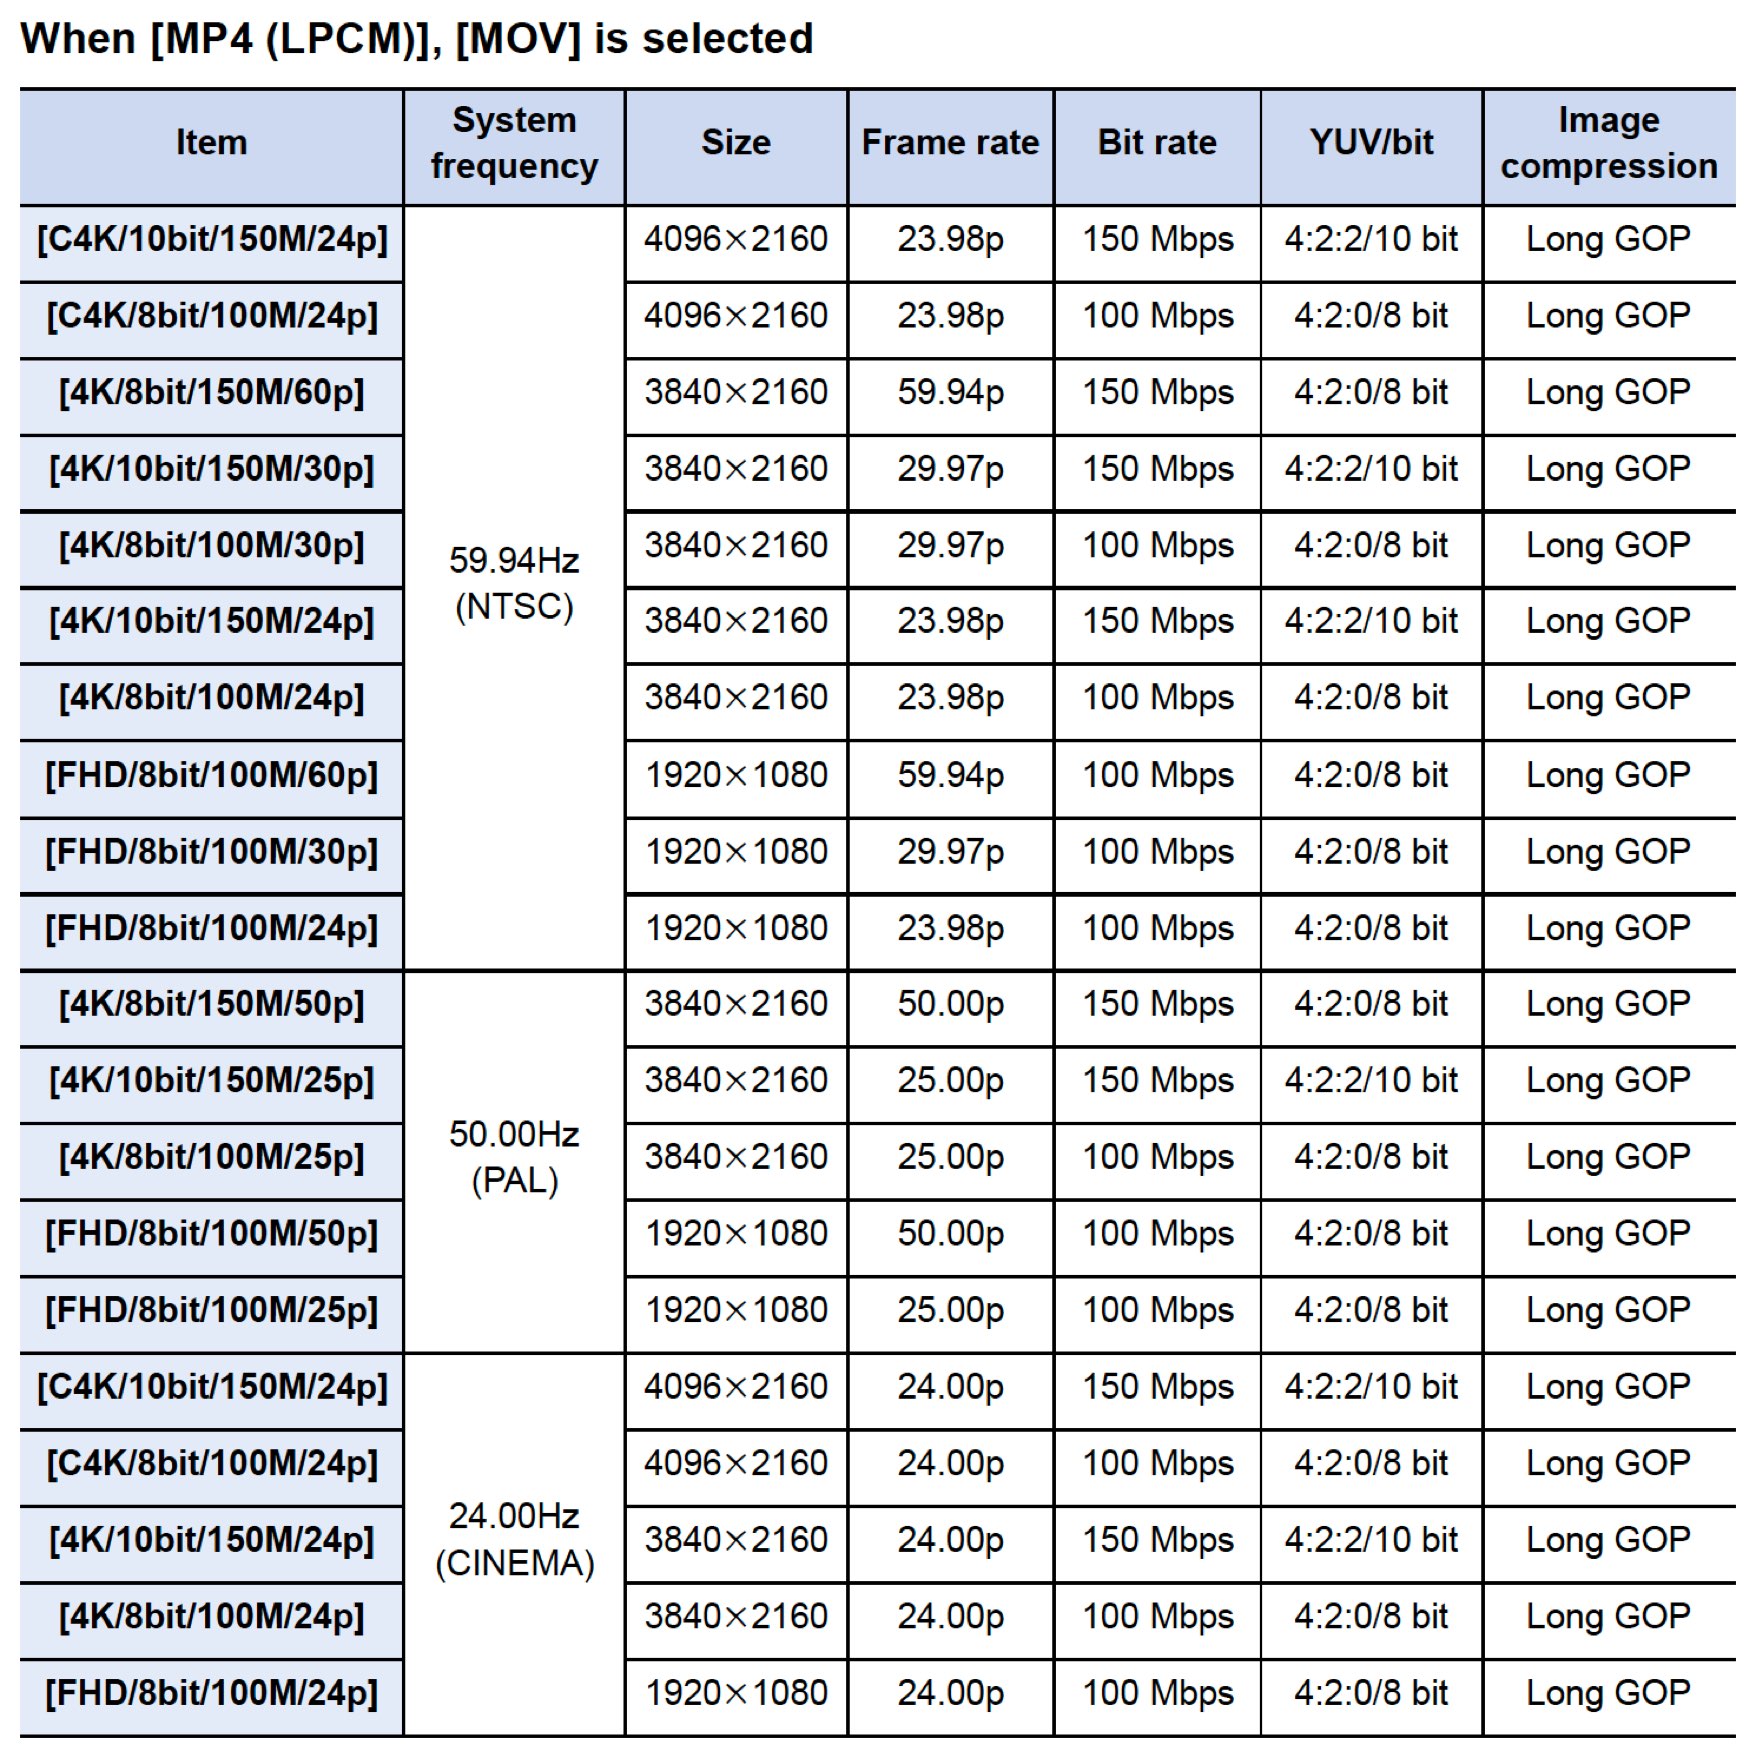
Here are more screenshots from the Panasonic GH5 Manual, which seems perfectly designed to scare people away. The charts do not reflect the most recent firmware version (v2.3) for the Panasonic GH5.
My Ultra Geeky Approach

I did something only a super geek would do. Made a pot of coffee, opened Excel, and with my camera on hand re-organized Panasonic’s charts in a friendlier and more useful way.
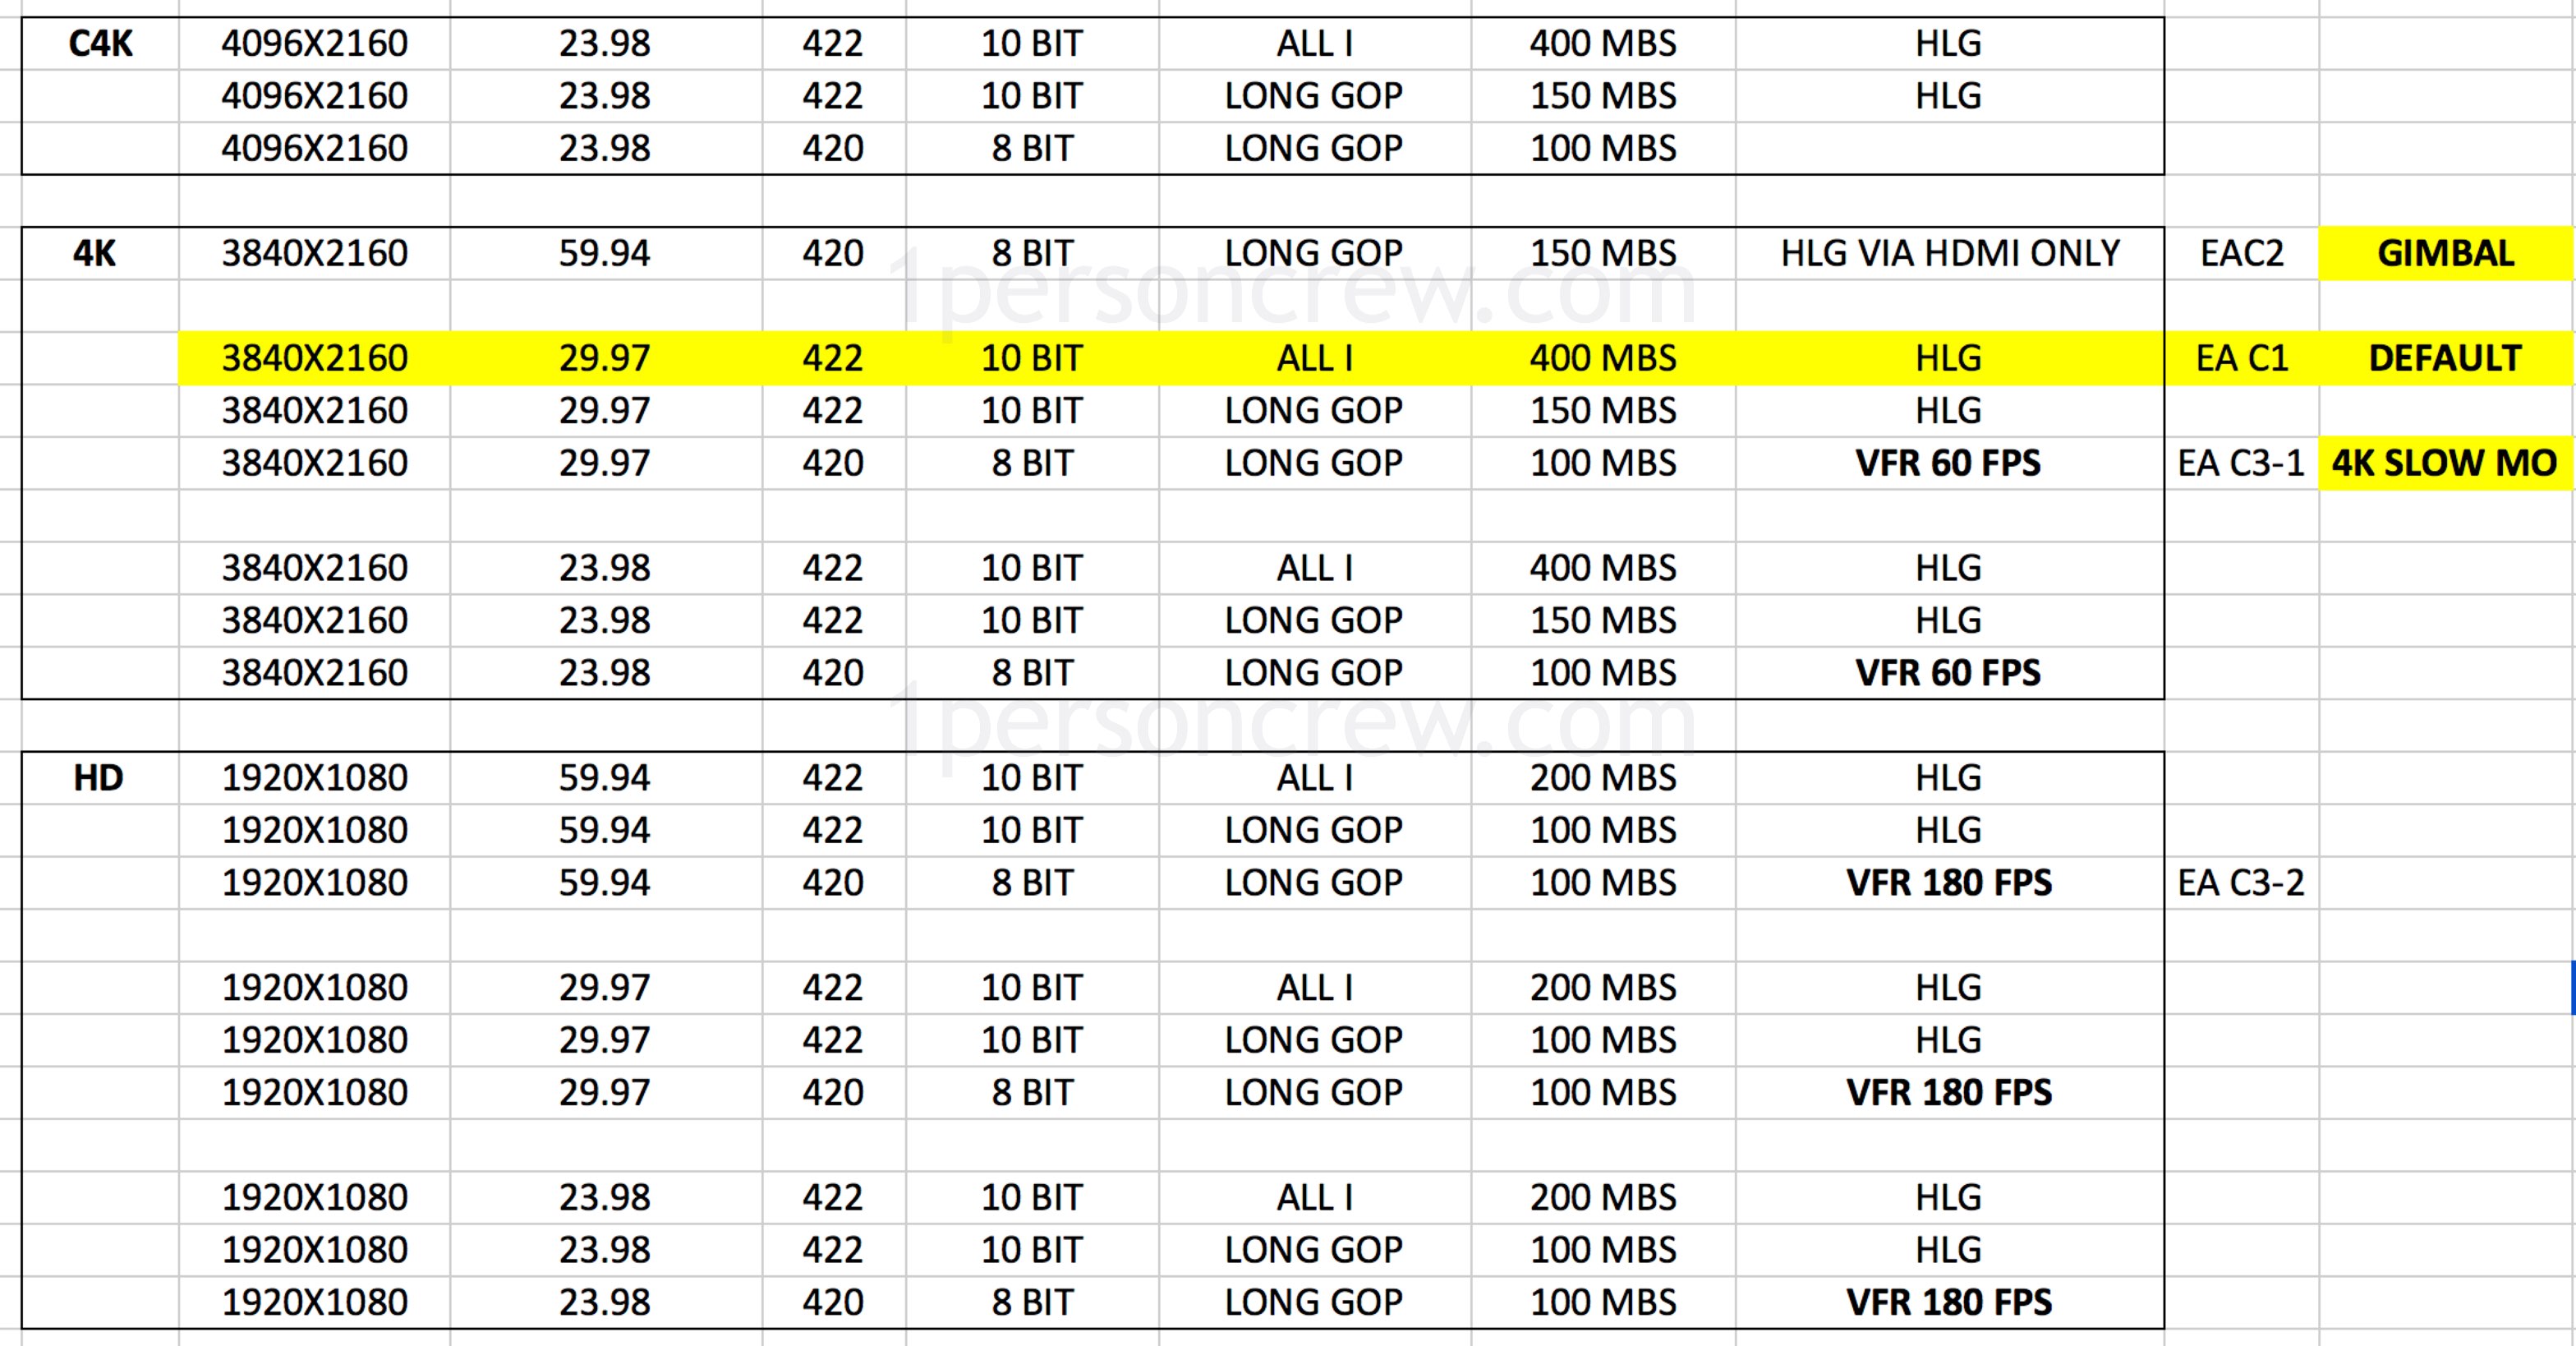
As you can see on the far-right column, I also added EAC1, EAC2 and EAC3. Those are my Custom Menus saved to each camera so the starting point is always the same.

Note: I prefer to shoot UHD (3840X2160) over Cinema 4K (4096X2160) simply because it is easier to incorporate into HD (1920×1080) projects.

3840/2 = 1920 and 1080/2 = 1080

My Default Modes
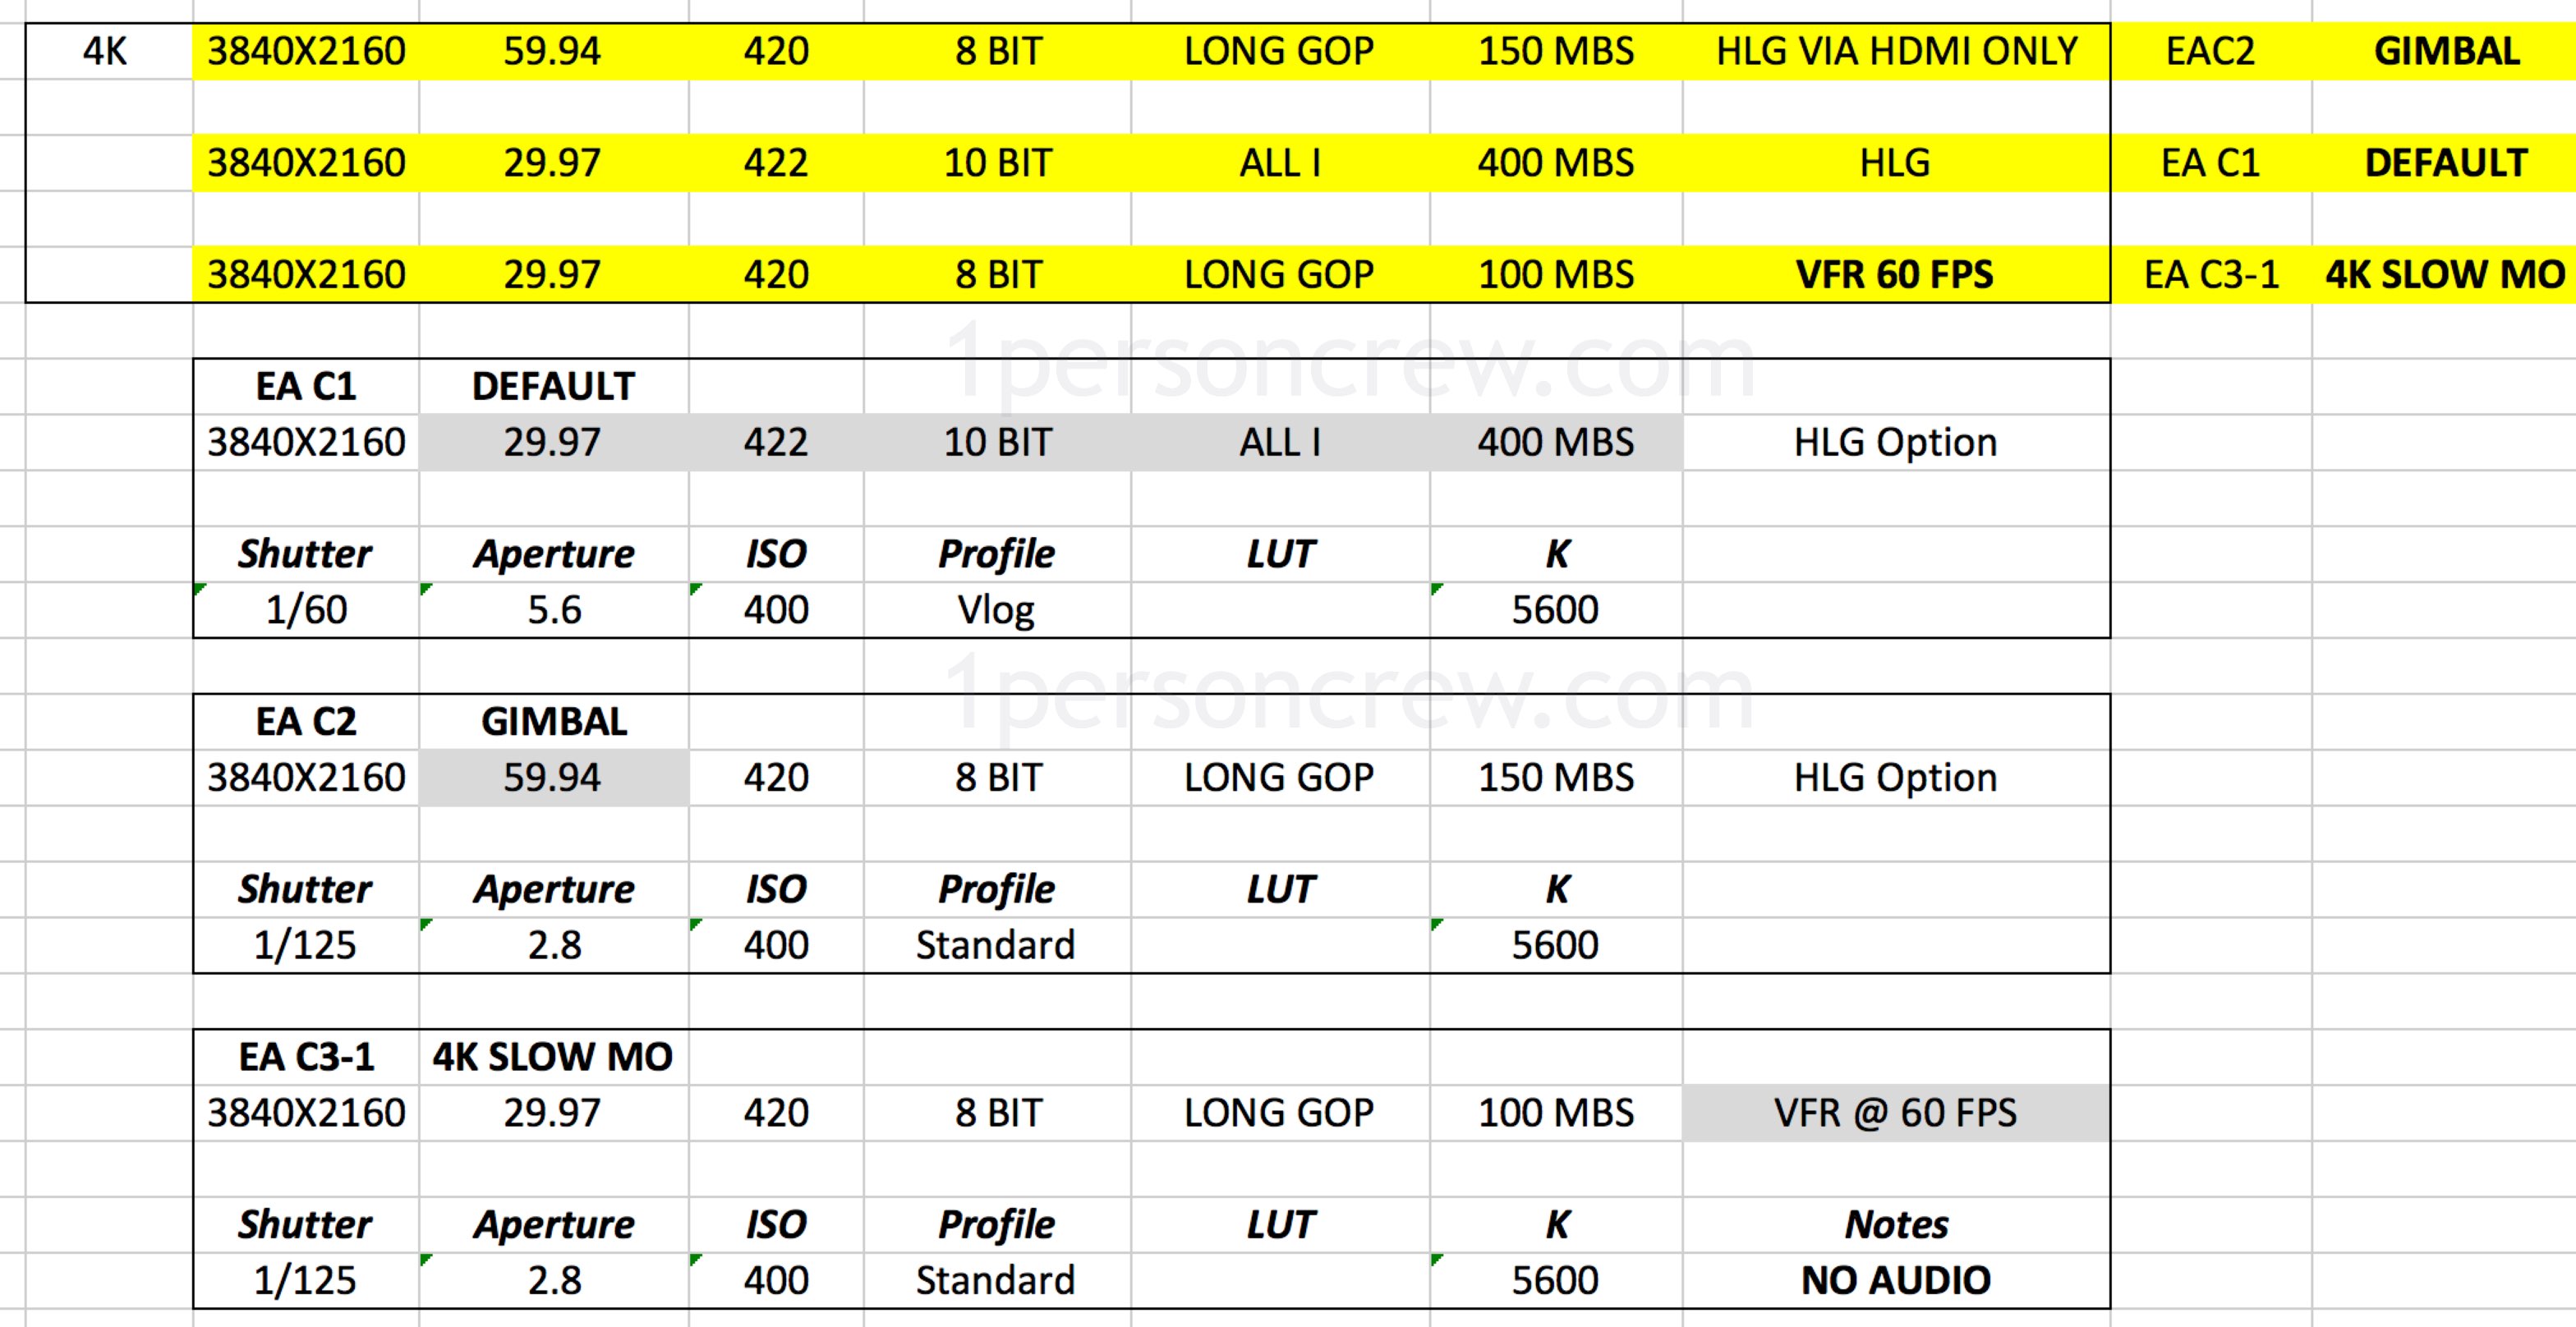
Since most of my work ends up on YouTube or Vimeo 30 frames per second is a good starting point.

Doubling the frame rate (30×2) gives us a good starting point for your shutter speed, which is set at 1/60th of a second.

Ideally we want to extract as much data from the camera’s sensor as possible, so I choose 422 10-Bit.

VLog (similar to S-Log on Sony, C-Log on Canon, and very recently N-Log for Nikon) is set my default camera profile, so I have more room to enhance the story through color. Keep in mind that I only go this route if I know I’ll have enough time for post-production, otherwise I’d chose the “default” camera profile and call it a day. 
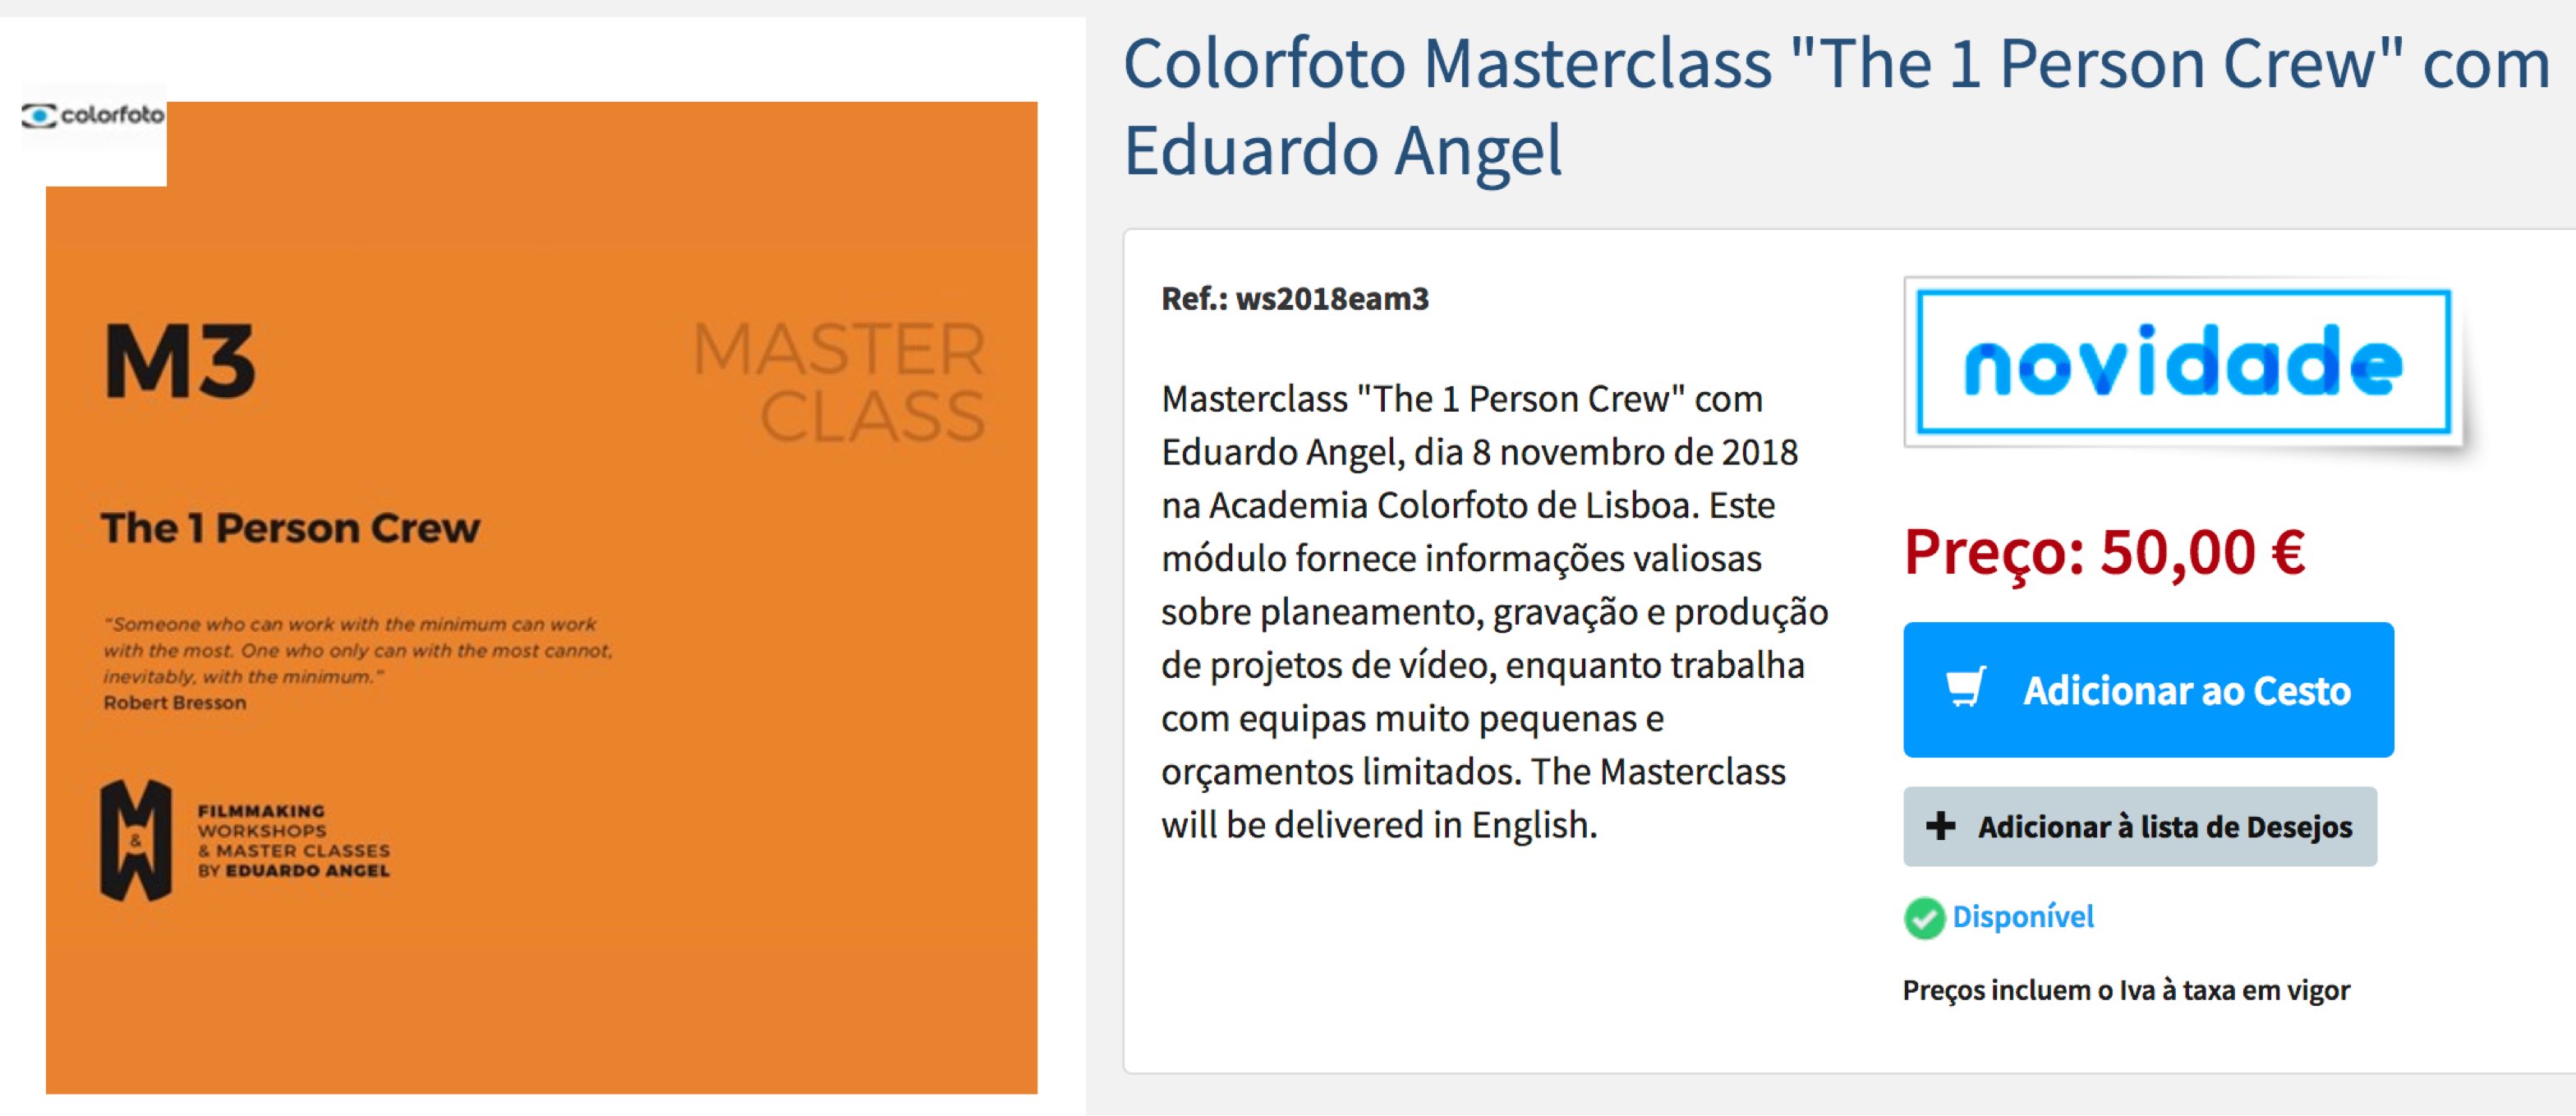
Upcoming “1 Person Crew” Master Class in Lisbon, Portugal. Come join us!

VLog has a minimum ISO of 400, so that’s that. An aperture of f5.6 is a nice starting point, as well as 5600 Kelvin for my White Balance.

EC2 is my Camera Setting for shooting on Gimbals and I use EC3 when I want/need to shoot at 60 frames per second and play with the footage in post. Here’s another post on Camera Movement.

The cool thing about this approach is that I can save my custom settings and import them into another Panasonic GH5 (running the same firmware version), without having to select every single option again.

Here’s how to perform that magic trick:
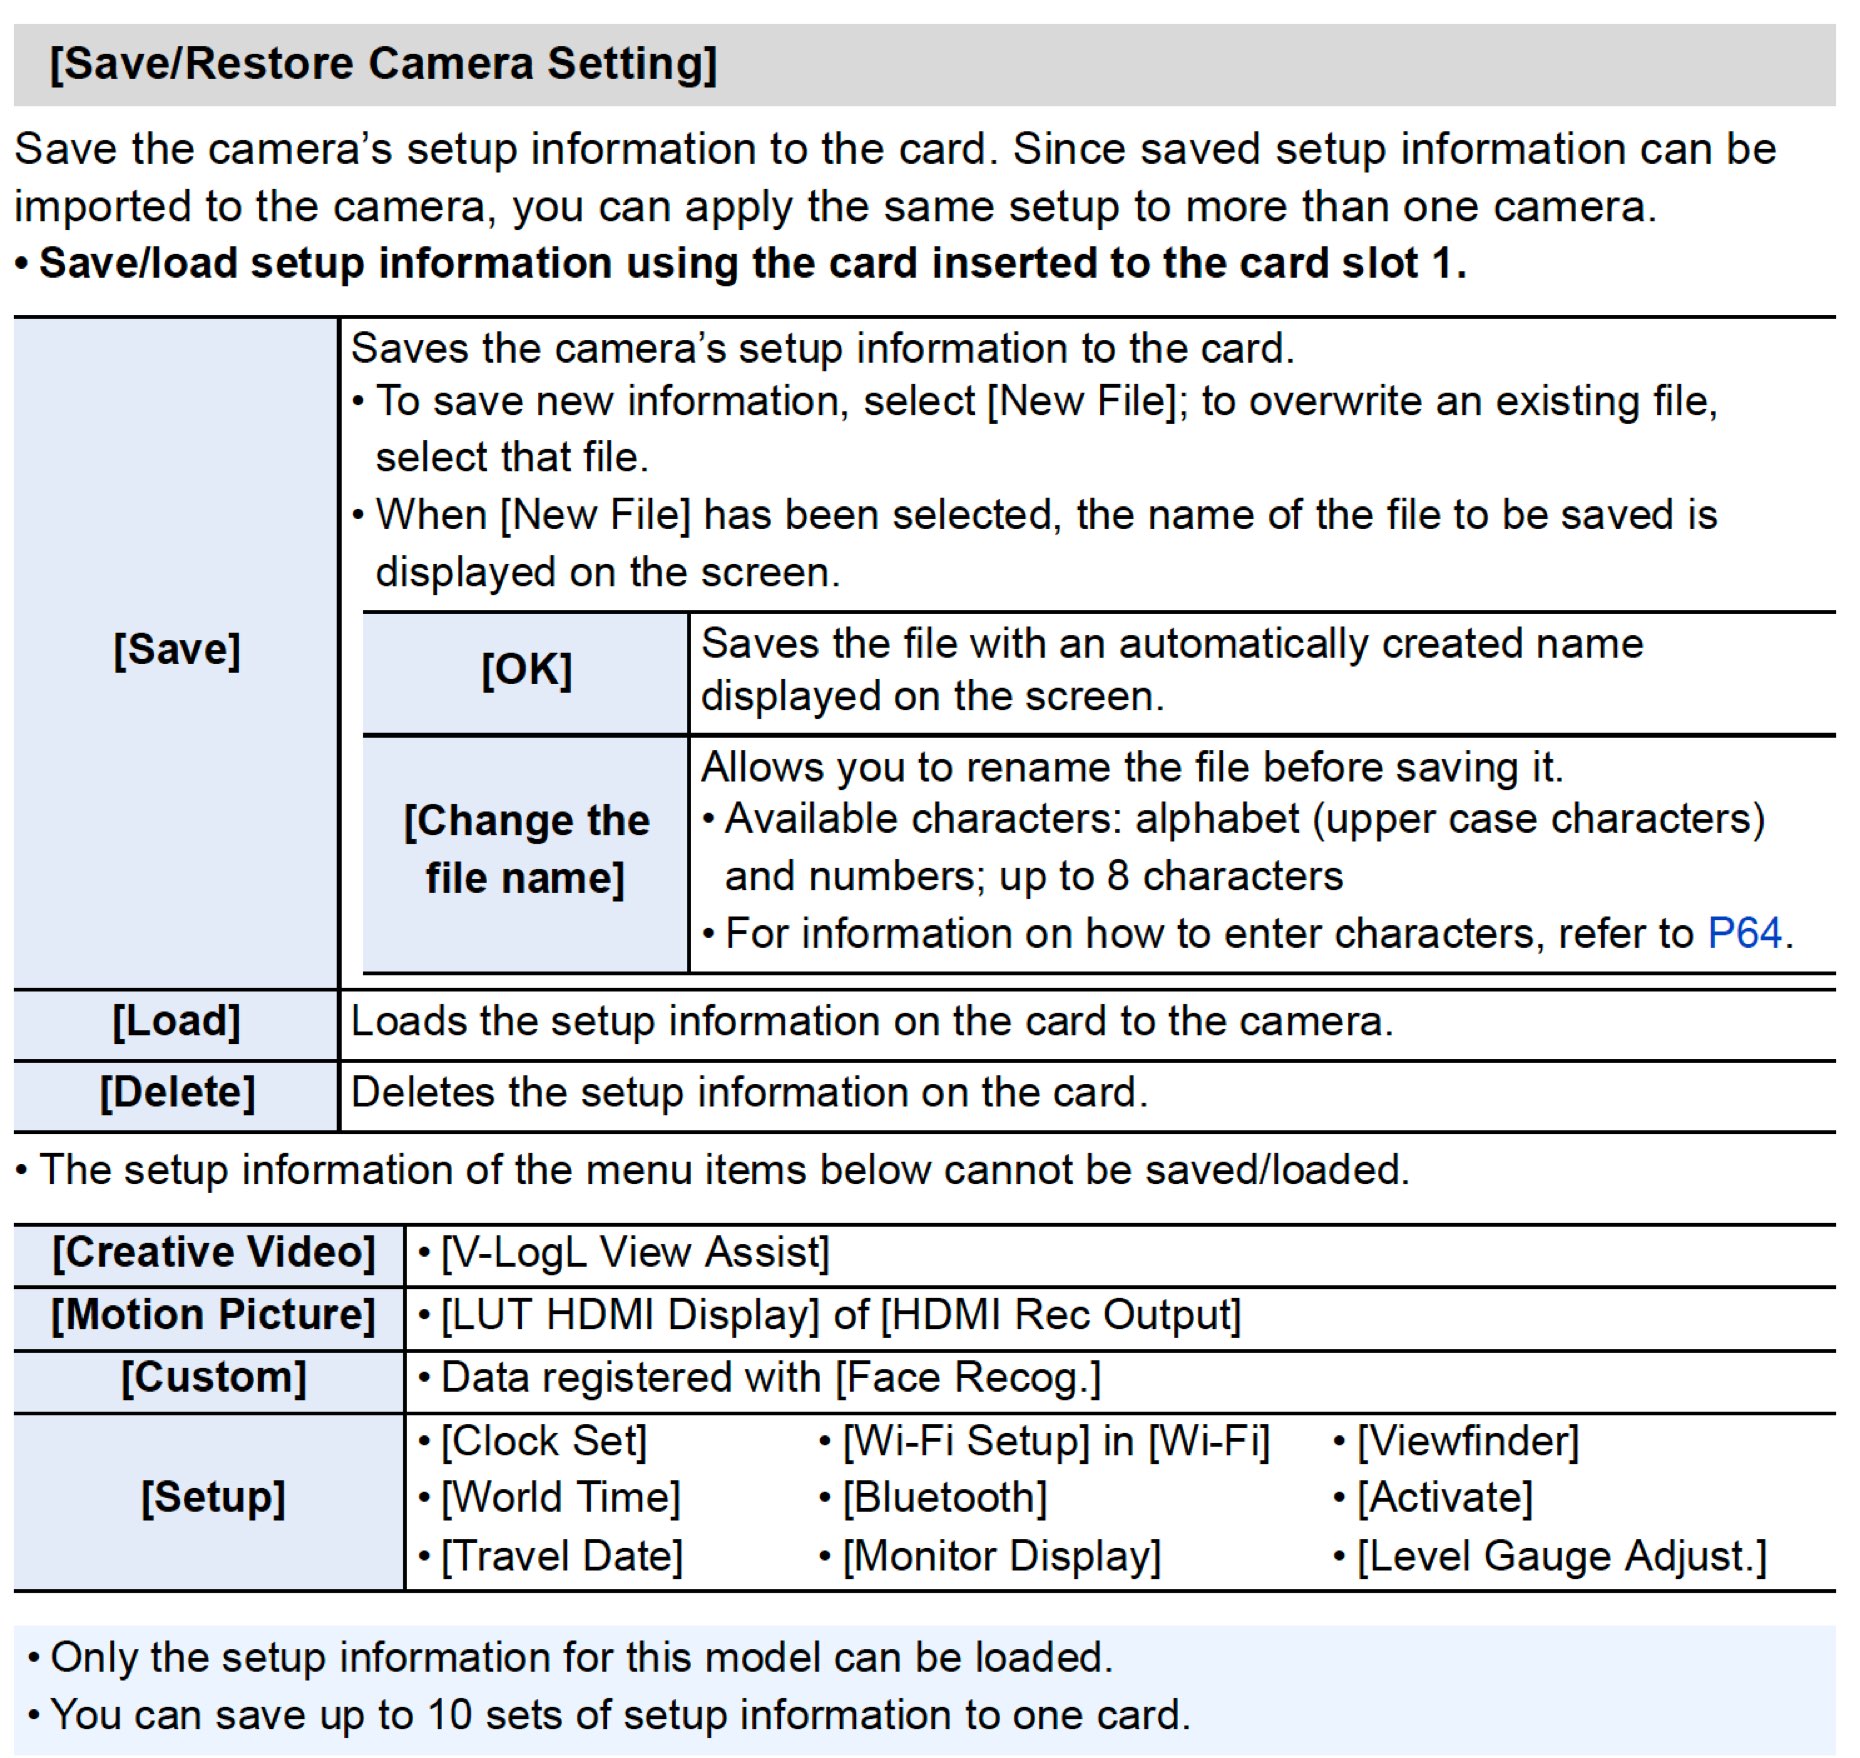
Working as a 1 Person Crew we constantly worry about audio, framing, exposure, directing and when to replace the batteries.  Anything we can do to save time and avoid potentially fatal mistakes is key. Saving Custom Camera profiles is in my opinion an underused but awesome trick. Enjoy!
Being unfaithful (and testing new mics).

I’ve been using Rode wireless mics for many years and never expected to change. There’s even a blog post on why I have been completely loyal to Rode for so long.

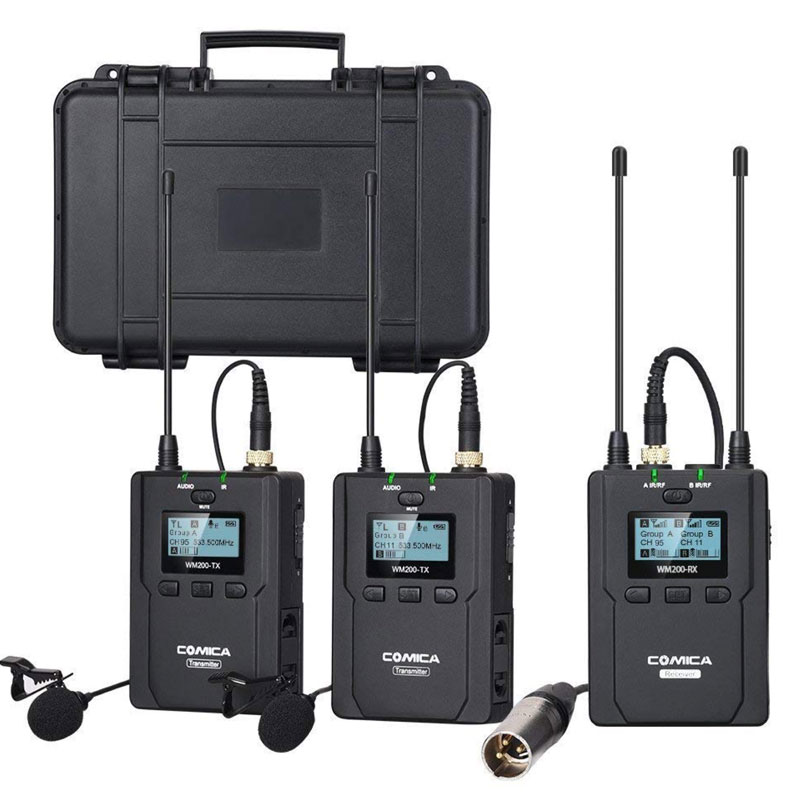
But, for the past couple of weeks I’ve been using a new set of wireless mics from a company I didn’t know: Comica.

Features

The complete kit comes in a nice hard case, and offers all the expected features:

  • 96-channels
  • Auto scanning
  • Real time monitoring
  • AA batteries
  • Lavalier mics included

Some other features stand out:

  • Adjustable RF signal strength which can be lowered to reduce power consumption and increase battery time 
  • A working distance up to 394 feet (120 meters) in a open area

But there’s ONE feature that tipped the scale for me: two transmitters can be used with only one receiver.

Audio Workflow

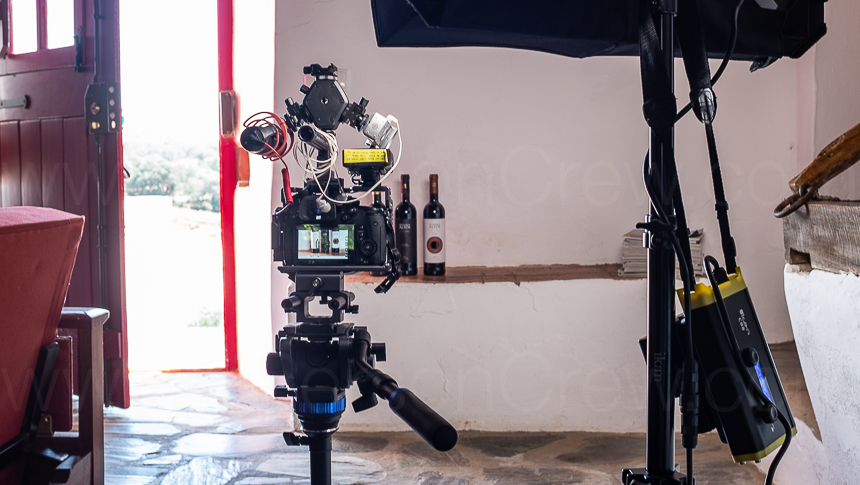
In practical terms I need only one receiver connected to an audio recorder (like this or this or this) and can record two people simultaneously. As you can see below, as a safety net and to record high-quality scratch audio, I used a Rode shotgun mic on my camera. Later in post I simply duplicate the track, keep subject A on Channel Left and subject B on Channel Right, and sync the audio and footage manually in a few seconds using PluraEyes.

The 1 Person Crew Approach

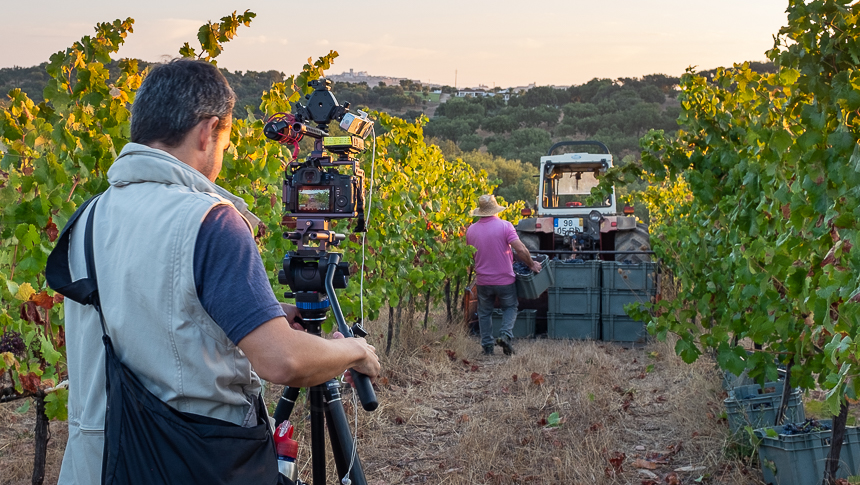
This past weekend I shot at a wonderful winery in Alentejo, Portugal. I previously wrote how I found this amazing location.

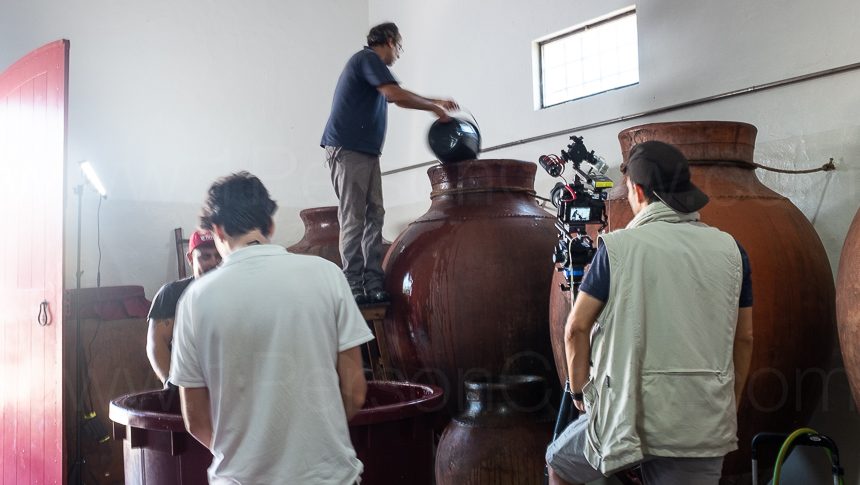
I wanted to document my two main characters, one winemaker on the field collecting the grapes with a small group of people, and a second winemaker at the shop, receiving and pressing the grapes. They both were working at the same time at two different locations.

Do you shot on the field with the beautiful early morning light and miss an event that happens only once a year, OR do you document the grape crushing process and get b-roll later with super harsh mid-day light?

As a 1 person crew my options were very limited. I did run like crazy all day to get enough footage of both, but by having a wireless mic on each subject the whole time I was able to also capture wonderful moments. For example, the small group of farmers singing and joking while picking grapes, and at the same time one of the winemakers describing his winemaking philosophy, and why they choose to use ancient methods over modern ones.

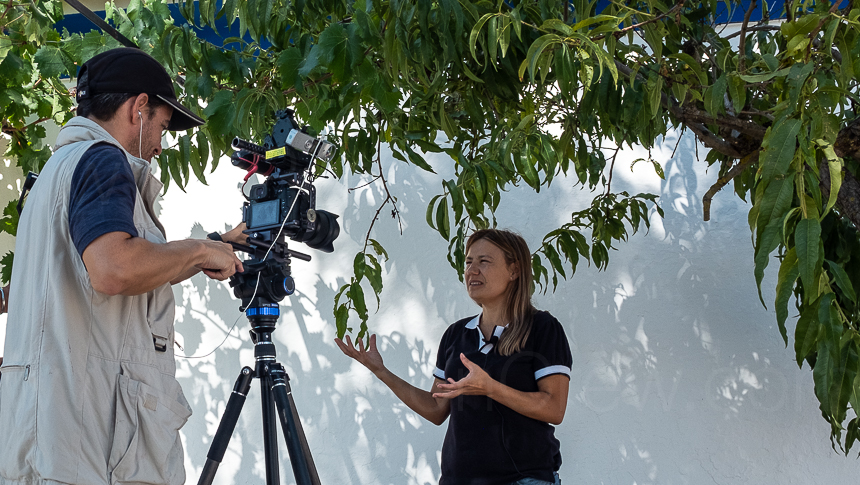
Trying to record a long and formal interview on the most important and busiest day of the year for the subjects was out of the question. And if you have done any interviews before, you know it is extremely rare to get this kind of spontaneous sound bites.

Pros and Cons

I used this kit for about 5 hours straight on a single set of AA batteries per unit, which is very impressive. I always use and recommend Eneloop rechargeable batteries, they cost a bit more but last much longer.

I’ve seen some complaints on Amazon about the quality of the mics. I haven’t noticed any issues, but will test the wireless transmitters with other lavalier mics in case I’m missing something.

There are also a few complaints about the battery holders (aka cartridges).  I agree with that one. The batteries are super tight, so I’d recommend getting three extra sets of battery holders to swap batteries much faster.

There you have it; how to record two people at two different locations with only one receiver and getting fantastic results. The 1 person crew approach. 

Amazing Adobe Premiere Pro tips.

I’ve been following Scott Simmons for a while, and on every article or webinar I’ve always learned at least one new Adobe Premiere Pro editing tip from him.

Today I wanted to extract and share the best tips from one of his most recents articles (“How I edited a complex feature documentary with in Adobe Premiere Pro with no crashes”), but there’s so much good info into a single article that I’m simply sharing the direct link -> http://bit.ly/2QnEjs6

Adobe Premiere Pro editing tips for documentary filmmakers.

Obviously,  the performance tips don’t ONLY apply to Adobe Premiere Pro, they could be used on any NLE. 

I found the RAID system Scott recommends on the article, the OWC ThunderBay 4 RAID 12TB, at least $150 cheaper here. It’s a beautiful beast!