Businesses of all sizes need better ways to offer their products and services to the world, and video is clearly the new language of brand communication. Learn how to plan a multi-camera production, increase production value through camera movement, and create cinematic lighting on a budget. Plus, get tips for adding great music and sound effects, saving time and money in post-production, and more!
All the video gear featured on (and used to produce) this course is available here.
Some links might be affiliates. If you purchase gear with them, I might receive a small commission at no additional cost to you. Thanks in advance for your support!
Questions?
Feel free to ask any questions regarding this course (on anything else) on Instagram.
From planning a shoot to DIY lighting solutions, learn how to produce professional videos with very little gear, tight deadlines, shoestring budgets, andno crew.
All the video gear featured on (and used to produce) this course is available here.
Some links might be affiliates. If you purchase gear with them, I might receive a small commission at no additional cost to you. Thanks in advance for your support!
Questions?
Feel free to ask any questions regarding this course (on anything else) on Instagram.
I’m very thankful with Benro for putting together a webinar to discuss the 1PersonCrew Approach. The host was my dear friend Matt Hill, who is not only an awesome guy, but also a multi-talented artist in his own right. Matt’s project with handmade paper dresses and long-exposure portraiture is jaw-dropping.
I hope attendees found the webinar fun and and helpful. In case you missed it (or want to rewatch it) here’s the full recording. Feel free to leave comments and questions below, or hit me on Instagram.
A quick Google search shows you that HLG (Hybrid Log Gamma) has been around for a while, yet, it’s something I didn’t really understand until very recently.
In today’s post I’ll share the most useful things I’ve learned about HLG, and when/how to use it.
History
You might remember several HLG-related announcements back in 2017:
“Panasonic releases firmware update 2.0 for the Panasonic Lumix DC-GH5 with added support for HLG recording.”
“Adobe Systems updates Adobe Creative Cloud which includes support for HLG.”
“Apple releases firmware update for Final Cut Pro X which includes support for HLG.”
“Sony supports HLG on 2017 4K TVs with a firmware update.”
After reading about this, and watching some “official videos” my reaction was “meh, whatever.”
What the hell is HLG?
This is exactly why I waited so long to play with HLG.
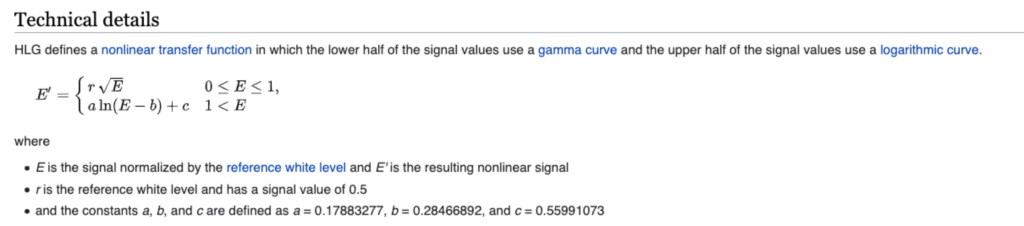
Glad you asked. HLG stands for Hybrid Log Gamma, which according to Wikipedia is “a backwards-compatible high dynamic range (HDR) standard that was jointly developed by the BBC and NHK.”
One of the most interesting aspects of HLG is that it is essentially HDR, but compatible with existing standard displays, reducing complexity and cost for both equipment manufacturers and content distributors.
Interesting findings from my recent quest to understand the HLG standard
HLG is royalty-free
HLG is supported by HDMI 2.0b, HEVC, and H.264/MPEG-4 AVC
HLG is currently being used by many video services including YouTube
Takeaway: HLG is a free HDR standard that works on normal monitors and is widely supported. Got it.
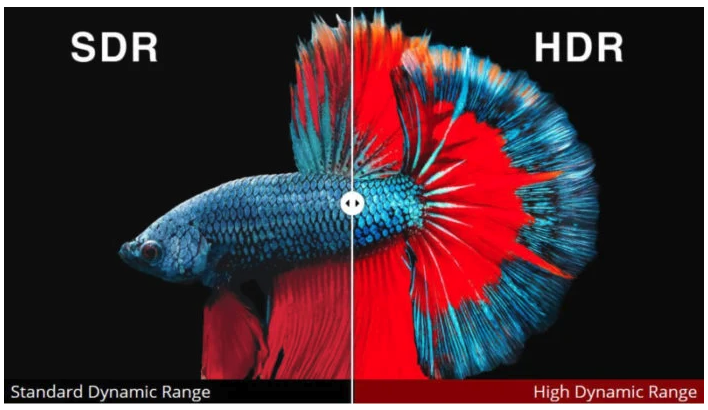
But,what’s the difference between HDR and HLG?
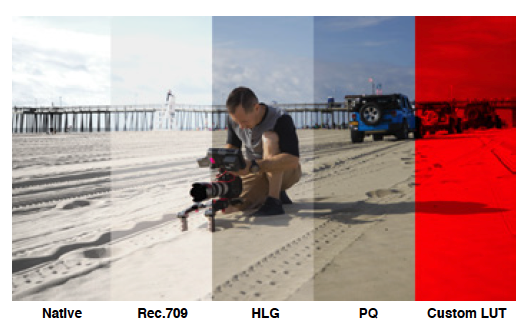
This gets trickier and unnecessarily dense. So, let’s keep it super simple. There are three main flavors of HDR:
Dolby Vision Involves a complex and expensive workflow, not 1PersonCrew friendly.
HDR10+ The most available format, but also requires labor-intensive grading.
HLG
In a nutshell, HLG aims to solve two big problems. The first problem is that Dolby Vision and HDR10+ aren’t suitable for broadcast signals. The second problem HLG is trying to solve is the need to produce two version (HDR and non-HDR) of the same content. In theory, with HLG one can shoot, edit, and grade, and the final videos will look good both on normal monitors and on fancy monitors. This is huge!
Takeaway: HLG offers similar advantages of shooting HDR, but the key difference is that both normal (SDR) monitors, and super fancy (HDR) monitors can display HLG footage.
Now the real important question: Do I need HLG?
As always, it depends. I like the simple approach Atomos takes on this matter:
“The first step in HDR is to recognize you have a HDR scene. Look for a good range of contrast across the brightest and darkest parts of your image and also across the color and tonal range as each color also contains its own brightness or luminance information. Secondly ensure you are sending a Log signal into the Ninja V so that you are recording the HDR Log information. The main impact of HDR is apparent in the specular highlights and bright areas. The areas that would have previously been ‘blown out’ will now contain visible detail and information to enhance your content. HDR provides more headroom allowing you to show more detail.”
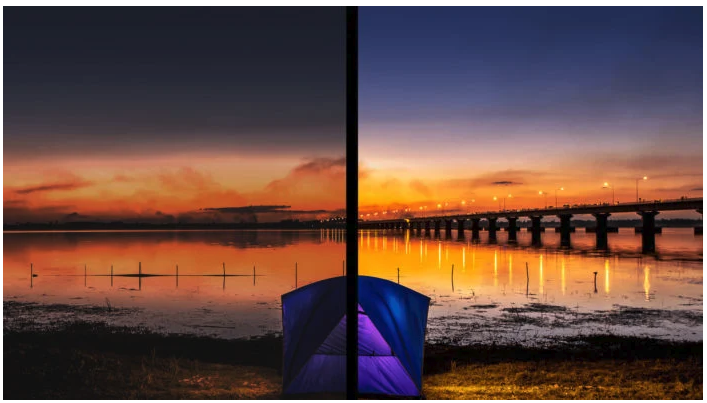
Simple. So, if you are facing a scene with a lot of dynamic range, with deep shadows and bright highlights, then it might make scene to shoot HLG.
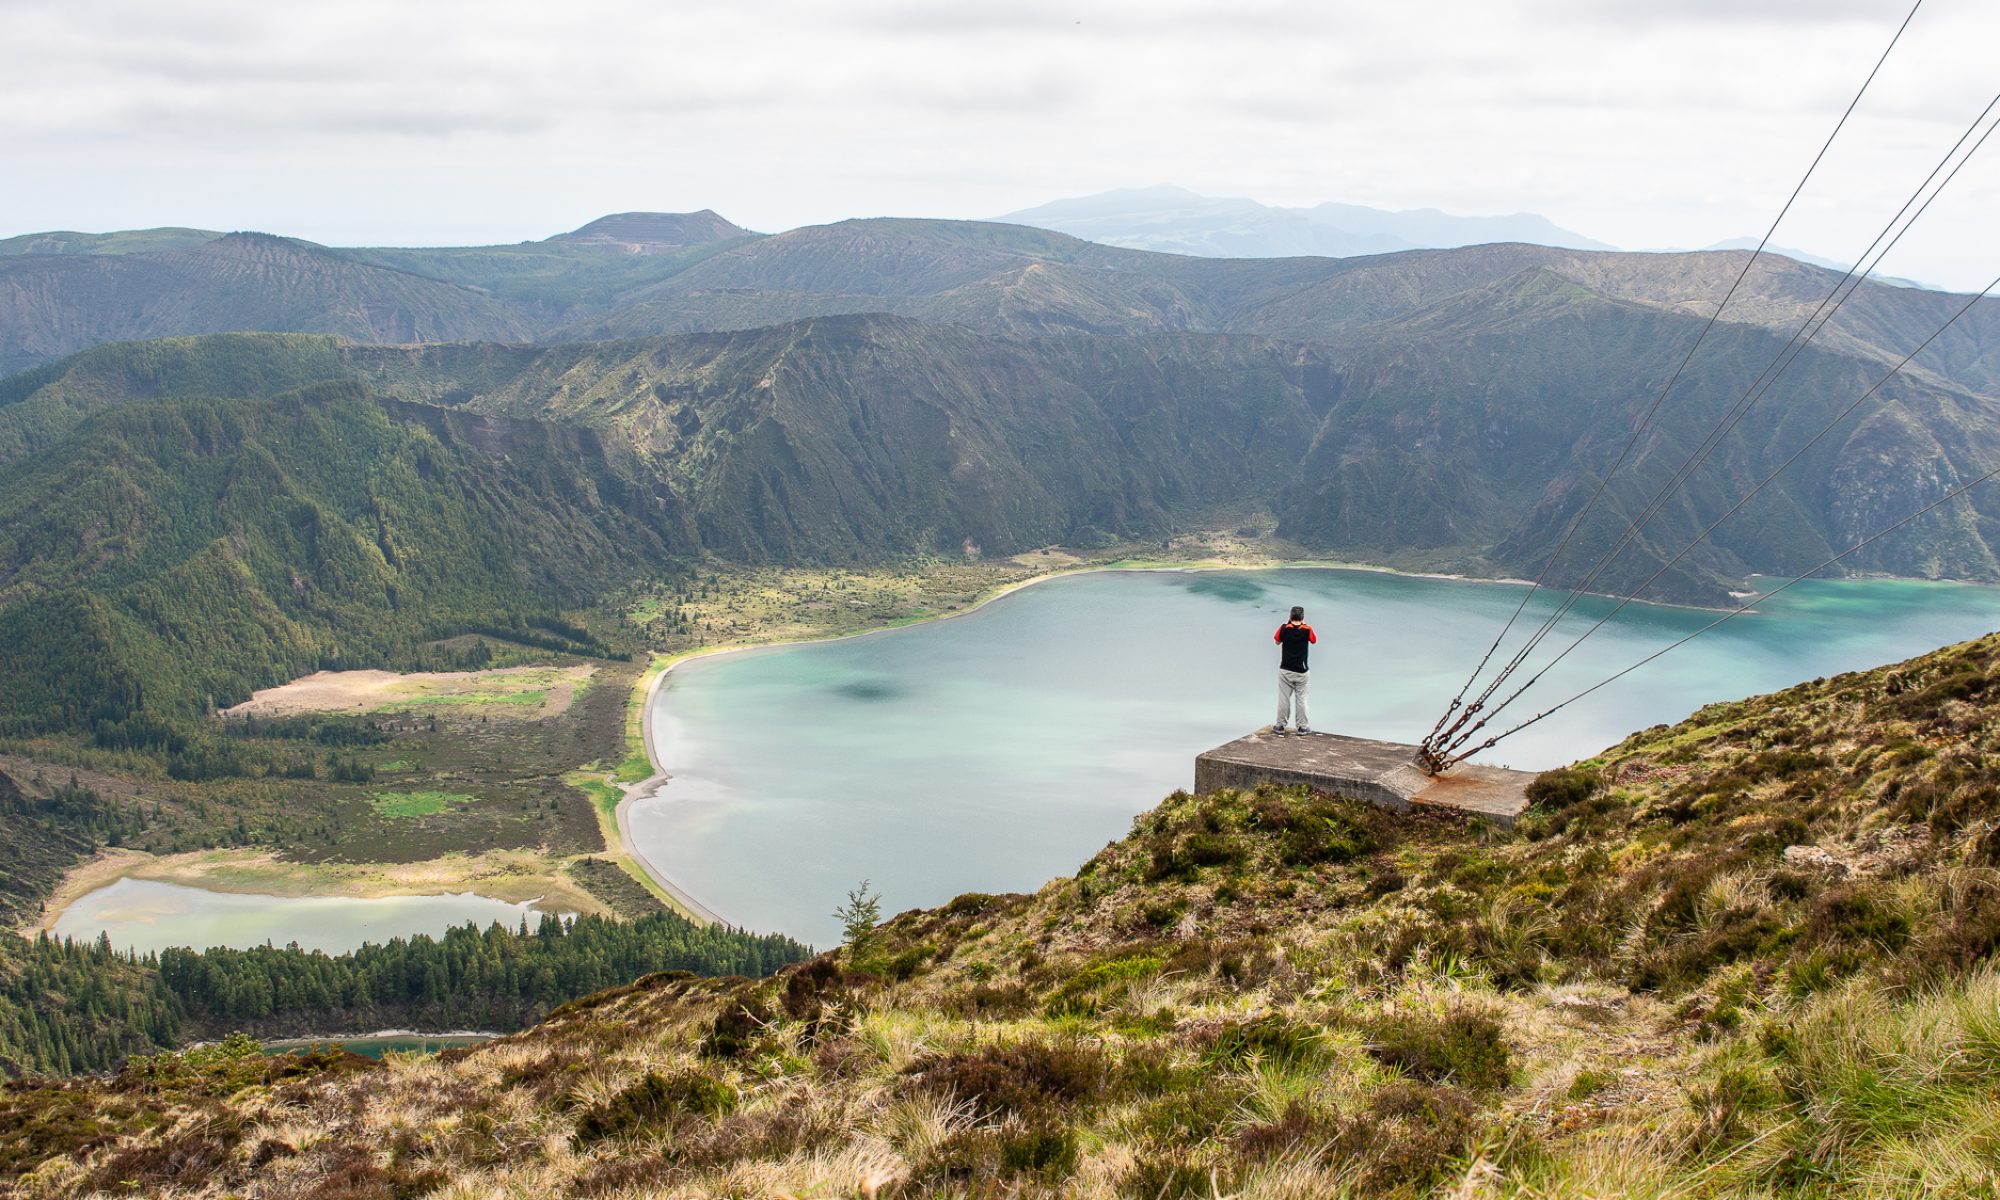
I can definitively see the benefit of using HLG on some of the Artisans Stories I’ve been producing, especially when working with available light and very bright locations/exteriors.
How to use it?
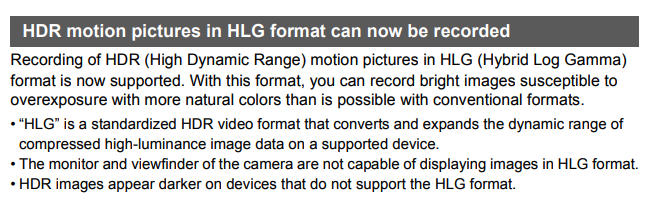
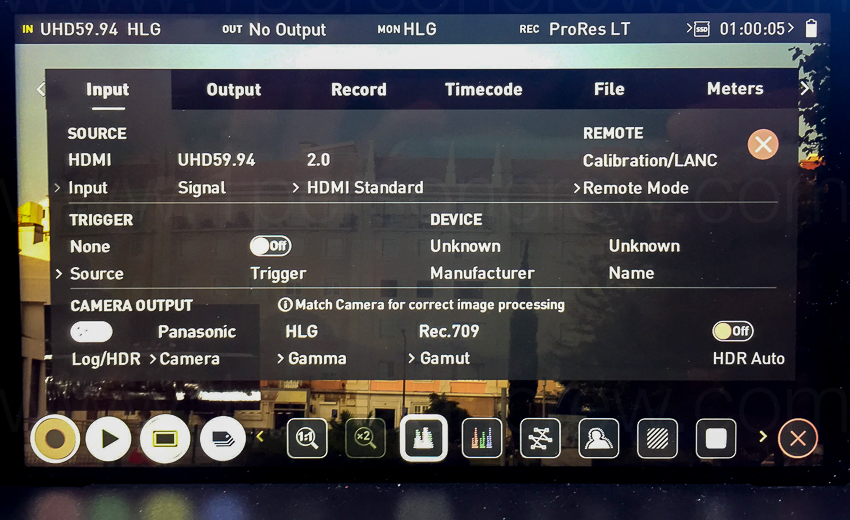
Obviously, we need to start with a camera that supports HLG. In my case, I have easy access to a Panasonic GH5. What’s very interesting about the GH5 is that it supports recording, BUT not displaying HLG.
To set up the camera, we need follow the instruction on this online PDF manual (Page 4).
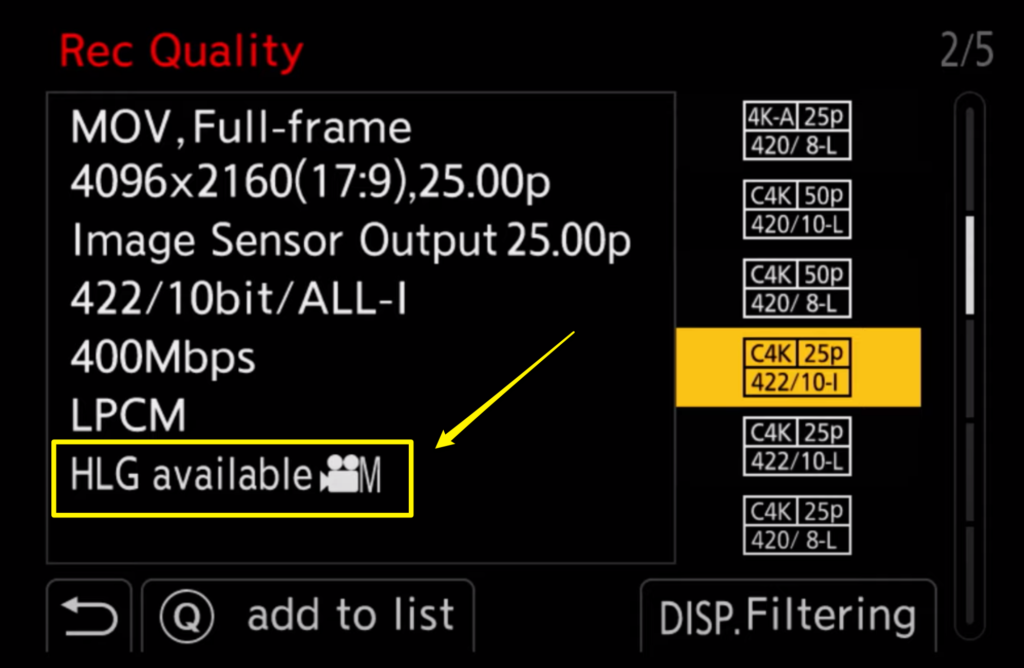
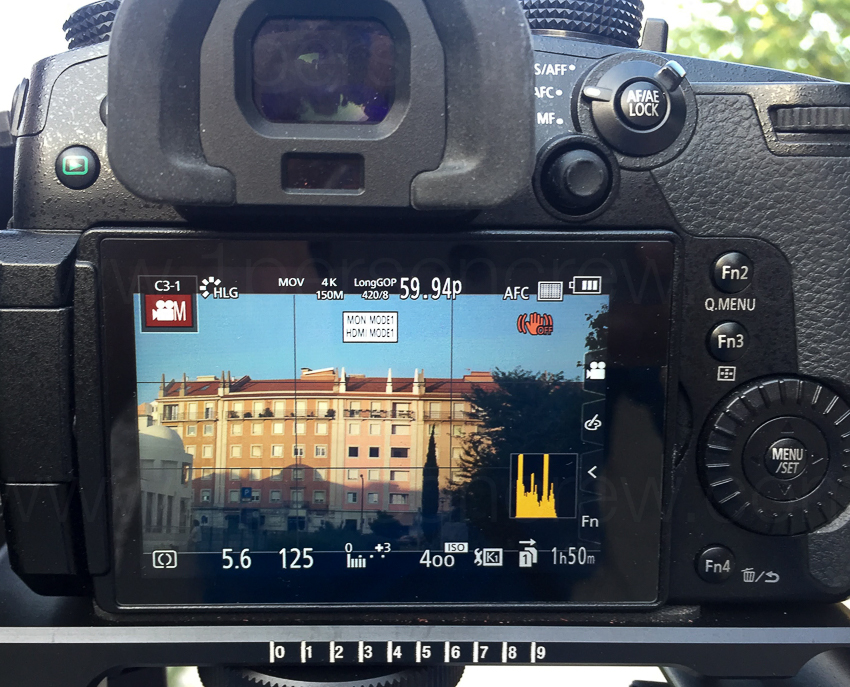
After several tests, my recommended settings for the GH5 are:
Select “Standard” as the Photo Style (aka Profile)
Under Rec Format select MOV
Under Rec Quality select 4K/8bit/150/60p (I know this doesn’t make sense, but follow along)
Under HDMI Rec Output select 4K/60p Bit Mode
NOW change the Photo Style to Hybrid Log Gamma
Important: For the GH5 to have access to 60p video, the camera must be in NTSC (59.94 frequency) mode. Weird, but that’s the way it is. Also keep in mind that with HLG the lowest ISO available is 400, and we can’t change Contrast, Luminance Level, or Highlight Shadow.
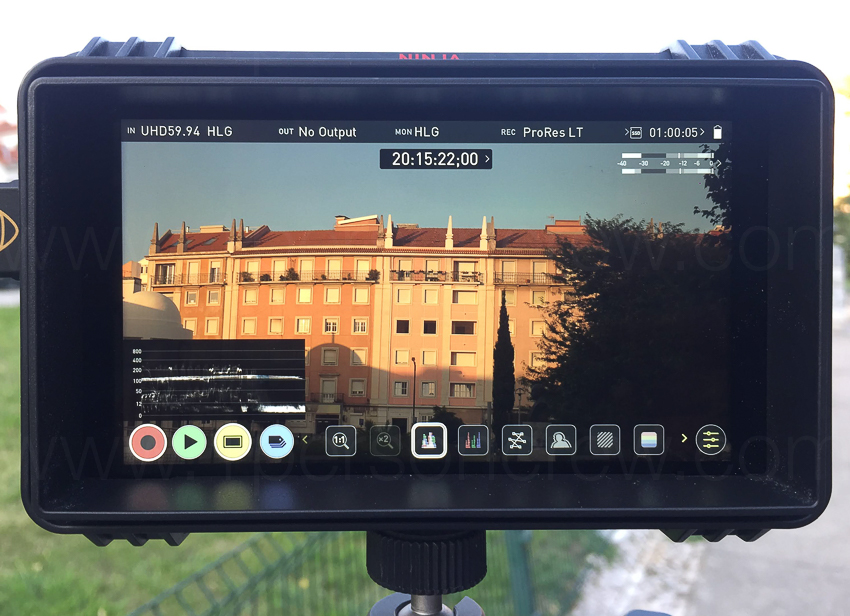
Setting up the Monitor/Recorder
To retain all of the 10Bit data, we need to set the Atomos Ninja V to record in one of the following codec formats:
Apple ProRes HQ
Apple ProRes 422
Apple ProRes LT
Avid DNxHR HQX (4k)
Avid DNxHD 220x (HD)
According to Atomos “another important item is a high quality HDMI cable that is capable of handling the bandwidth of a 10Bit 4K60p signal. These cables are generally labeled “2.0a” (though not every 2.0a cable is made well enough to work properly).
Here’s more info directly from Atomos regarding the Panasonic GH5.
Takeaway: Even if your camera supports HLG, you might need an external monitor recorder. The setup process is far from quick or intuitive, and LOTS of testing is required before using HLG on a real shoot.
The 1PersonCrew approach is to save the cameras settings we use more often as Custom Menu so we are up and running with a click of a button.
For example, on the Panasonic GH5 I have set the C1 menu for Standard 4k 24p 5600k shooting, the C2 Menu for slow-motion, and now the C3 Menu for HLG.
Not all resolutions and codecs support HLG, so check your camera’s manual.
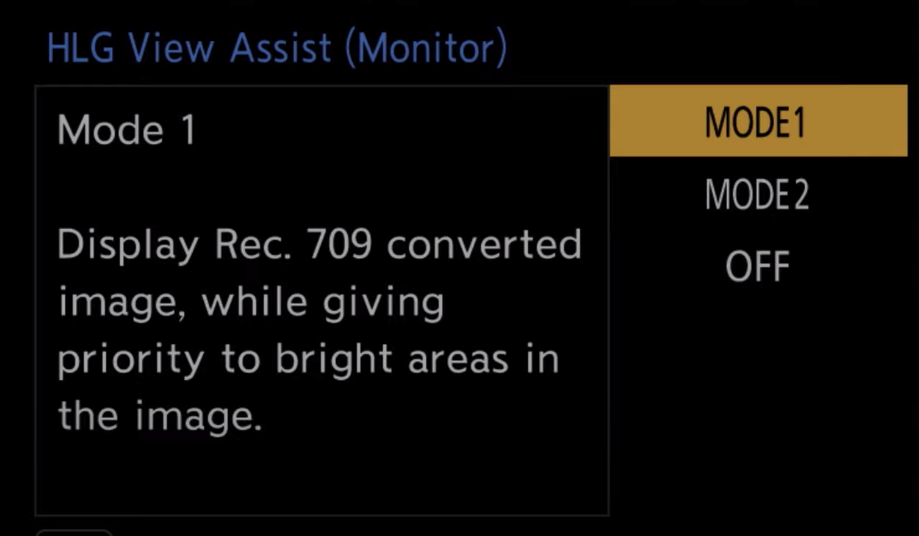
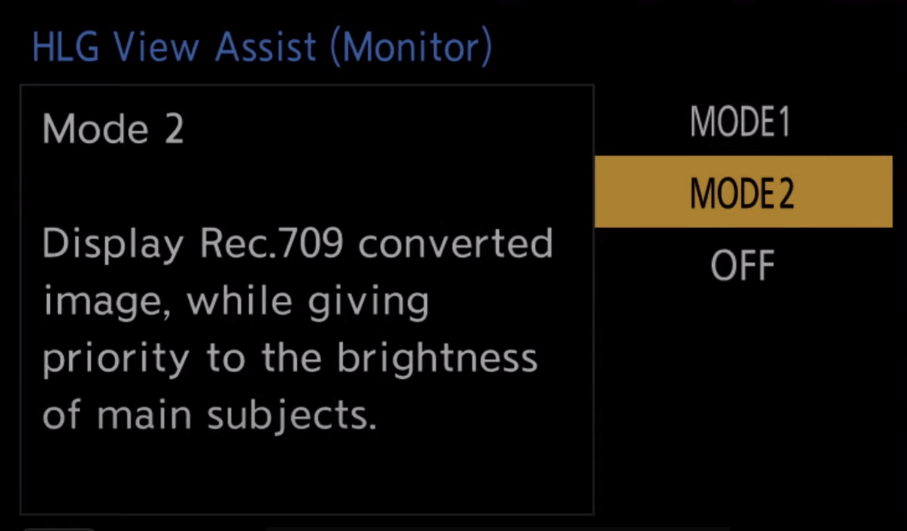
On the Panasonic GH5 the HLG View assist options can not be more confusing…
What’s next?
I’ve been doing lots of different tests, under different lighting conditions and using different settings both on the camera and the Ninja V.
I might write a second post on this once I’m happy with the results and if/when I’m able to come up with a simple and consistent shortcut for the settings.
It’s great to talk about camera movement in the abstract: “the camera turns 360 like in “Gravity” and then we do a really slow long tracking shot like in “The Shinning.”
Sadly there’s also real life, and it comes with real people usually working in tiny and crowded spaces. Besides the actual physical challenges, we should consider the reasons to move the camera, in other words, it’s a good idea to think WHY are we moving the camera before we get into HOW to do it.
Watch the video below for a real life example:
And here’s a 90-second version of the Bookbinder’s story.
Which camera should I buy? What’s your favorite lens? How many lights do I need? What’s better, a shotgun mic or a lavalier mic?
I don’t know.
These are the kind of questions I get every week, and unfortunately it’s very hard for me to answer them objectively and responsibly. Why? Because I need a lot more info. For example, what’s your budget? Do you have other gear or are you getting started? Are you mostly working on location or in a studio?
The “ideal” gear for a travel filmmaker working alone is completely different than the one required by someone shooting products in a studio environment. A documentary shooter needs a few versatile lenses and works mostly with available light. Someone producing similar content, but as an in-house, full time employee at a corporation can afford more time and gear, especially lights.
As you probably know by now, my approach is “how to do more with less.” My goal is to own as little gear as possible, not only to keep my overhead low, but most importantly to select the gear based on each story, my client’s requirements, and obviously, the available budget.
I created three lists to share my favorite tools; one for the travel filmmaker who’s priority is size and weight. The second list is for those who are getting started or are looking to add new/better tools. And the third list is for more experienced filmmakers who want to take their productions to the next level.
After doing a lot of research and trying multiple options, it’s clear that the best way to keep models, specs and prices always up to date is to host the lists on Amazon.com.
Here’s the first of three kits:
The Travel Kit
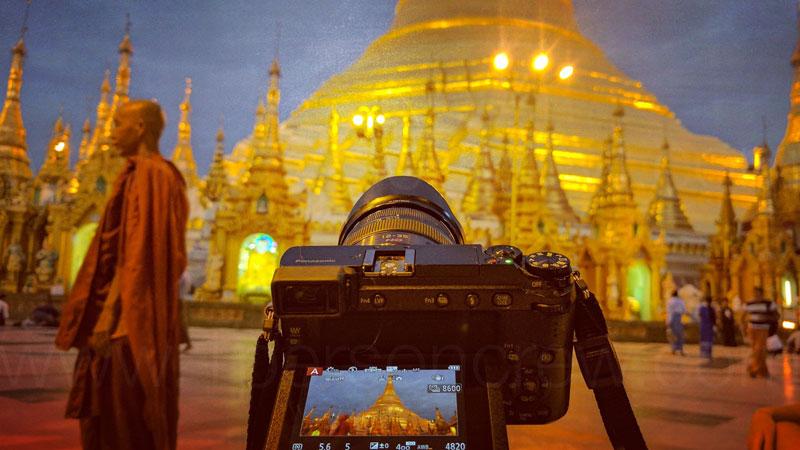
This ultra minimalist setup consists of the most essential items I take with me on travel and lifestyle assignments, which is the main bulk of my production work. Travel assignments require extremely light and compact gear that must fit in one backpack, and maximum a carry-on bag.
It doesn’t matter how awesome a piece of gear is, if it’s too big or heavy, I can’t take it with me. On travel assignments most of the work is done with available/natural light and only essential sound (like interviews) is recorded on location.
Some post-production might be performed during the assignment (especially waiting at airports and during long flights). Backup is extremely critical as re-shoots are often impossible.
The gear lists are not paid or sponsored by anyone. They reflect my own independent opinion, and the companies and products I use and trust. Some links might be affiliates, which means I may get a few pennies if you decide to purchase something. Thanks in advance for your support!
In the 1950’s the ocean freighters were heading into bankruptcy. It was too expensive and slow to move cargo around the world by water. The merchandise waiting at the docks often got spoiled or stolen.
The shipping companies, did what they usually do to lower costs. They fired a lot of people, and focused on making the ships faster, bigger, and more fuel efficient. That worked for a while, but the costs kept increasing and the shipping times didn’t improve substantially.
A good idea.
Then, someone had a great idea: What if the cargo could pre-loaded, so when a ship arrived, it would take hours, not days to load and depart? Bingo! The shipping container was born.
An even better idea.
A few years later, someone else had an even better idea; what if the shipping containers could have all the necessary parts to build a product, and the time from A to B could be utilized to assemble that product? Bingo again!
Today, all the necessary parts to build a car are loaded into a shipping container. The ship arrives, loads, and departs. While in transit, the cars are built. Three weeks later, when the ship arrives to its destination, complete cars get off to the dock and the empty containers are replaced with fully loaded ones. Brilliant.
Now, how can we possibly apply a similar approach to video productions?
I’ve spent a lot of time thinking about this challenge. The first step is to identify the most complex or time consuming processes, and then find ways to simplify them down to the least amount of gear and steps.
So buying a faster computer, a larger monitor or hiring a faster editor are just temporary solutions. What if we could blend some pre-production and productions steps? Even better, what if we could replace post-production all together?
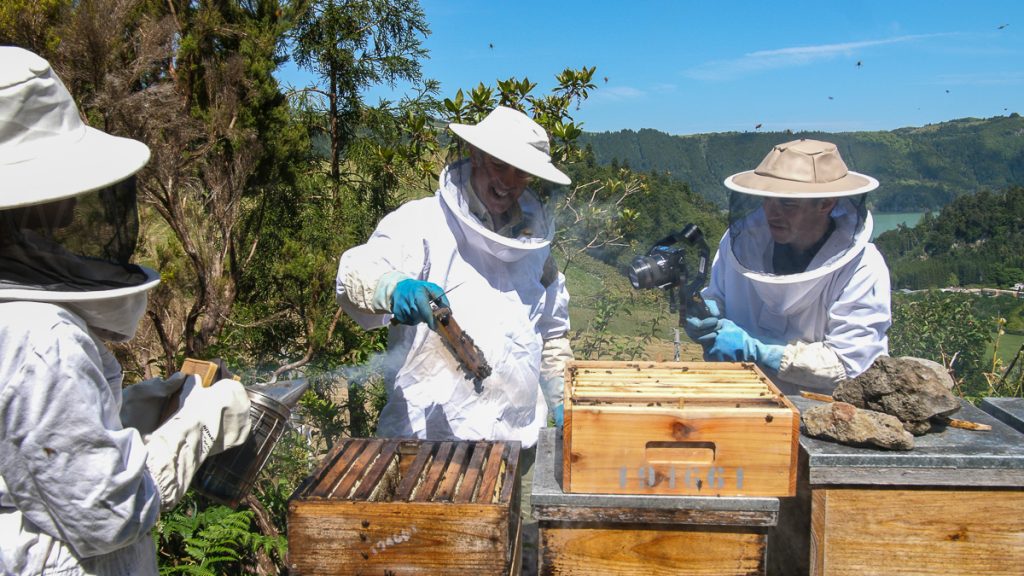
The topic will the “1 Person Crew productions.” I’m used to travel and work alone, but for this course, for the bar has been raised. A lot. I need to find ways to do everything myself: shoot the story, capture behind the scenes footage, and produce valuable educational content, essentially at the same time. I’ll be producing short-form documentaries with real people in active locations, so I need to be respectful of their time. Not an easy challenge, but a very exciting one.
How am I going to pull this off?
I don’t know (yet).
My wife insists that a Vlog, could be a great way to document and share some of the ideas, tests, and challenges I’m dealing with in preparation to the 1 Person Crew online course.
I’m not so sure. I’m not young enough or thin enough to start vlogging. Even worse, I don’t have a mustache and I don’t wear tiny hats or striped shirts.
If (with an IF the size of a billboard) I go this route, I’d like to keep everything as RAW as possible, in other words, people would see my unmade bed, unshaven face, a crazy collection of cables, and a very unorthodox, but effective, workflow.
Why would I even consider doing this? I honestly believe that anyone interested or involved in run and gun scenarios (documentary, education, weddings, corporate, red carpet premieres, product launches, sporting events, music videos and even short films) will get something useful from my experiments (and public suffering). Let’s see. I might test the idea this week and see what happens.
Here’s an article, and a couple of related books, in case you want to know more. The “Minimalism” documentary is also worth watching because these people TRULY live with the bare essentials.
Sign up
below to make sure you don’t miss upcoming posts and tutorials.
“Cinematic camera movement seems too daunting. Where do I start?” I’ve heard endless variations of this comment.
Part of the problem is that there are too many techniques with confusing names, and lots of tools that achieve seemingly similar things. A bigger problem is that as a one-person crew our plate is pretty full with checking the proper exposure, making sure the image is sharp, directing, asking questions, monitoring audio, etc. Do we really have to worry about moving the camera? The short answer is yes.
Let’s get this out of the way; it is entirely possible to shoot good videos without any camera movement. But we would be overlooking a powerful resource. I truly believe that understanding when and how to move the camera can go a long way to enhance our video productions and infuse them with a more “cinematic” style. Let’s go over the most common options and briefly discuss their advantages and disadvantages.
Handheld
Handholding the camera is by far the easiest option. There’s no need for additional support gear, it takes almost zero time to set up or break down, and it is very quick and easy to reframe. When used properly, intentional handheld movement can infuse a shot with urgency and tension, something we typically see in war and action films, reality TV shows, and many documentaries.
A clear disadvantage of handholding the camera is that footage that seems “pretty steady” on a tiny monitor often proves unusable when watched on a larger screen. Another challenge is that even if I’m working with a small camera package, after a few hours of work my arms and back are completely exhausted. A more serious consideration is that even with an audience visually educated by YouTube, unintentional shake can make our videos appear amateurish to many viewers.
Handholding the camera and shooting at 120 frames per second.
Monopods
A relatively inexpensive and very powerful tool is a professional video monopod. By professional I mean that it should offer good payload capacity, counterbalance, a 3-leg base, smooth panning and tilting, and a universal quick release plate. It might be just me, but the quick release plate tends to disappear every other assignment.
A huge technical advantage of monopods is that we can mimic a lot of movements typically achieved with much bigger and heavier tools like sliders, jibs, dollies, and cranes, but monopods weigh very little and some can be packed in a carry-on bag. When combined with a versatile zoom lens and a shotgun mic, a monopod setup can go a long way.
Using a monopod in unusual ways can lead to interesting shots.
Gimbals
Gimbals have significantly improved my skills as a filmmaker. Small, very portable, battery operated, and relatively simple to set up and use, gimbals have freed me to expand my camera movement lexicon. They allow me to move with or around an actor and add kinetic energy to otherwise static subjects, such as buildings or trees. Gimbals give me the freedom of shooting handheld while keeping my shot perfectly stable, eliminating distracting or unwanted shake.
Of course, there are disadvantages, mainly that gimbals need to be perfectly balanced, and with anything that is added to or removed from the camera package, a new setup is in order. This is why when shooting with gimbals I prefer to use a very small camera and a fixed wide-angle lens and a wireless mic. Zoom lenses tend to be bulkier and if the focal length changes I might need to rebalance.
Gimbals allow us to get very close to a subject, and quickly explore multiple compositions.
Tripods
The good ol’ tripod is a wonderfully versatile tool, but I can’t afford to carry a 50-pound state-of-the-art tripod with me, just in case I need it. In addition to the weight limitation, I often shoot in very tight places, and most tripods need a considerable amount of space to set up. Luckily we now have access to tripods that are extremely compact and light.
A solid video tripod is ideal for very smooth pans and tilts. Do you need to rehearse and repeat the same motion? Do you need to time the actor’s movement? Do you need to hit precise marks? Then you need a tripod. Also, would I shoot a long interview with a fully rigged camera handheld, on a monopod or with a gimbal? Of course not, that’s what a tripod is for!
The good ol’ tripod is a very versatile tool.
Other Tools
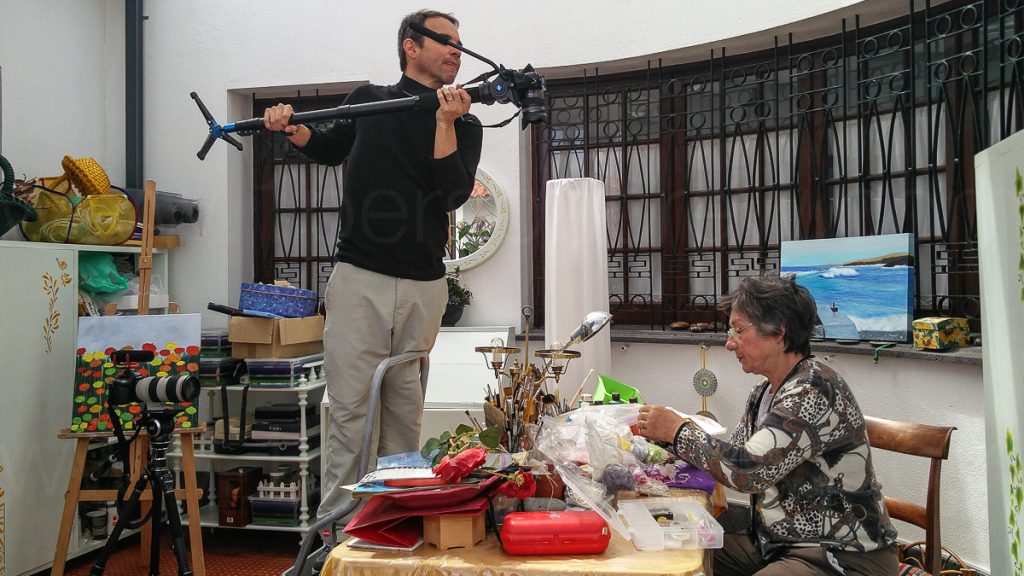
The fourth and last tool (in this post) is called an “EasyRig.” It looks similar to a Steadicam vest, and on paper it sounds like a great setup for run and gun projects where the shots are hard or impossible to predict, the subject is moving continuously, and where extended shooting times are required. The perfect example would be shooting behind the scenes coverage on any of my projects. The “easy rig” looks too bulky and heavy for a one-person crew, but I’m definitely open to giving it a shot on future assignments.
On upcoming posts we’ll explore other tools and techniques, including the best jibs and sliders for a one person crew.
Conclusion
Camera movement is a lot more than following a character or capturing the action. And obviously, no single camera movement technique or tool will represent a specific feeling or message. Everything depends on the story and its context.
My advice is to learn as much as possible about camera movement, but NOT to incorporate movement just because we have a new tool; rather, understand and appreciate the dramatic effects of each type of movement and how it can enhance our stories.
DISCLAIMER This article is not paid or sponsored by anyone. It reflects my own independent opinion. I only recommend companies and products that I trust. Some links might be affiliates, which means I may get a few pennies if you decide to purchase something. Thanks in advance for your support!
The Coronavirus outbreak has forced a global lockdown. Most governments are enforcing travel restrictions with random checks on roads, highways, and bridges and are requiring justification for traveling anywhere, even within a city. Because of this (and other reasons) most shooting assignments have been canceled or at best rescheduled. But this does NOT mean we can’t continue looking for interesting spots for upcoming projects.
This short article covers the 1 Person Crew approach to legally scout locations during a lockdown in two steps:
Step 1: Google and Google Earth
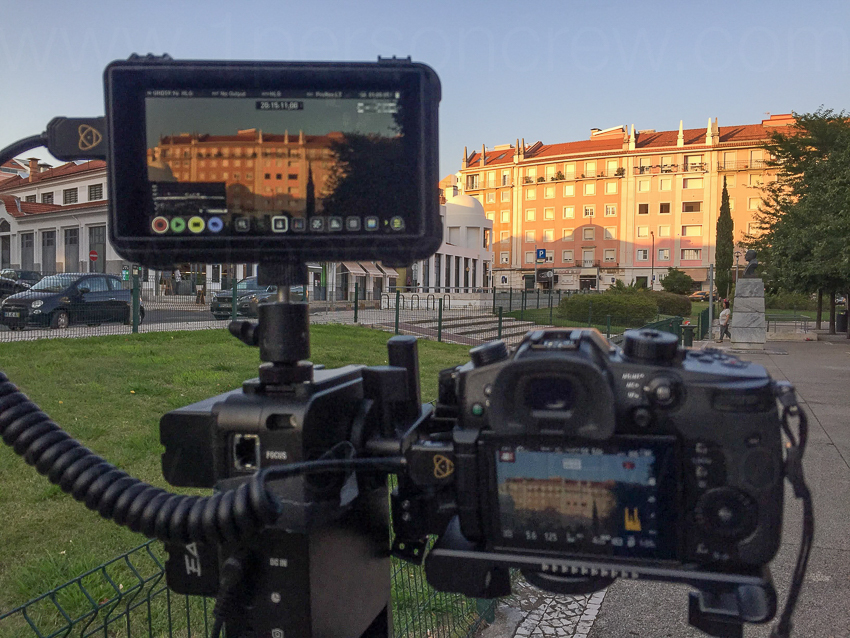
A quick Google search for “the best viewpoints in Lisbon” offers 30,000,000 results in 0.87 seconds. Wow. Another option is to search for “melhores miradouros em Lisboa” (306,000 results in 0.61 seconds) which most likely offers better recommendations from locals.
Three viewpoints immediately get my attention: Miradouro de Santa Luzia, Miradouro das Portas do Sol, and Miradouro da Graça. I like these three spots for several reasons:
They are reachable by public transportation.
They are close to main roads so I can use a share-riding service like Uber to get there.
The three are within walking distance from each other, yet they offer different perspectives of the city.
They all seem to offer good shooting opportunities at sunrise, sunset and at night.
Not only the views, but the viewpoints themselves seem visually interesting.
Portugal is safe at all times, so I don’t have to worry about that, but that would be another consideration anywhere else.
Here’ s a screen recording of my research process using only Google and Google Earth.
OK. I now have three potential locations, without leaving my desk. What’s next?
Step 2: Exercise
We are being “asked” to stay at home,
with few exceptions, which usually include:
Buying food or other essential items
Going to work if unable to work from home
Going to hospitals or health centers
Going to care for someone
Returning to their primary residence
Walking pets
Exercising outdoors for short periods in groups smaller than 2 persons
Aha! This last exception is our salvation. Now that we have identified three interesting spots, close to each other, and at a reasonable distance from home, it’s time to go out and exercise.
Then we need to pack everything into the smallest possible bag to avoid drawing unwanted attention.
My lovely wife also enjoys working out while enjoying this incredible city, so I was lucky to have an assistant this time. =)
That’s it! You are ready to explore the world and
scout potential locations for your projects. But remember: Wash your hands,
don’t touch your face, maintain social distancing, and travel only for
essential tasks (including location scouting for upcoming shoots).
PS: I wanted a “spy movie” kind of soundtrack, and it took me about 3 minutes to search, find, download and cut the song “Ace of Spades” from Artlist.io by far the best music library I’ve used. And now they also offer sound effects! Highly recommended.